 USD
USD EUR
EUR GBP
GBP CAD
CAD
Protective Hairstyles For Black Women
Protective Hairstyles For Black Women
Calling all trendsetters and curl enthusiasts! Get ready for a hair revelation – the world of protective hairstyles for black women. Our hair isn't just strands; it's a dynamic expression of strength and style. Protective hairstyles are the game-changers that elevate it all. From the timeless allure of braids to the transformative magic of wigs and weaves, we're exploring a realm where protection meets unparalleled beauty.
Ready to redefine your style? These aren't just hairstyles; they're bold statements of strength and confidence. Get set to slay effortlessly as we unravel the marvels of protective hairstyles for black hair. This is more than a journey; it's an uncharted style revolution!
Understanding Protective Hairstyles
Protective hairstyles are more than just a fashion statement; they're a nurturing embrace for our strands. Designed to shield our unique hair textures, these styles serve as a form of armor against the daily potential damage.
Black hair textures demand a little extra love and care. From tight coils to loose curls, each strand has its own story. Protective hairstyles recognize this diversity and provide the tailored care that black hair deserves. It's not just about style; it's about giving our hair the extra protection it craves.
Popular Protective Hairstyles For Black Women
Embarking on a journey of self-expression and hair health, protective styles for black women offer an array of stunning options. From traditional braids and twists to modern wig and extension techniques, each style serves as a canvas for creativity and a shield for your natural beauty. Let's delve into the concise introductions for the following styles:
Protective braids and twists
1. Classic Box Braids:
Timeless and versatile, classic box braids involve sectioning hair into small, square-shaped sections and braiding them from the roots.
Step 1: Preparation: Start with clean, detangled hair. You can use a gentle shampoo and conditioner to ensure your hair is ready for styling. Moisturize your hair with a leave-in conditioner to add extra hydration.
Step 2: Sectioning: Divide your hair into small, manageable sections. This not only makes the process easier but also ensures each braid is uniform.
Step 3: Adding Extensions: If you're aiming for length or thickness, now is the time to add extensions. Make sure they match your hair color for a seamless look.
Step 4: Braiding Technique: Begin braiding at the roots, ensuring that each section is tightly woven for a neat appearance. As you move down, maintain consistent tension to prevent the braids from becoming too tight or too loose.
Step 5: Sealing the Ends: Secure the ends of your braids using hot water or a hair-friendly adhesive. This step ensures durability and a polished finish.
Tips and Tricks:
-
- Experiment with different sizes and lengths for a personalized touch.
- For a trendy look, consider adding beads or cuffs to your braids.
Classic Box Braids aren't just a protective style; they're a timeless expression of beauty and culture. With a bit of patience and creativity, you'll be rocking these iconic braids with flair and confidence!
2. Knotless Box Braids
A modern twist on the classic, knotless box braids provide a more natural look by starting the braids without a knot at the root.
Step 1: Preparation:
- Begin with clean, detangled hair. A gentle shampoo and conditioner combo will do the trick.
- Apply a leave-in conditioner to keep your hair moisturized throughout the process.
Step 2: Sectioning:
- Divide your hair into neat, small sections. This not only aids in the organization but also ensures a seamless and natural-looking result.
Step 3: Adding Extensions:
- Integrate extensions for length and volume if desired. Opt for extensions that match your hair color for a cohesive finish.
Step 4: Knotless Braiding Technique:
- Unlike traditional box braids, knotless box braids start with your natural hair at the roots. This technique reduces tension and promotes a more comfortable wearing experience.
- Begin braiding, gradually incorporating the extension hair as you move down the section.
Step 5: Secure the Ends:
- Dip the ends of the braids into hot water to achieve tapered and polished ends.
Knotless braids are a modern twist on a classic look. With this technique, you'll enjoy a lighter feel and a chic aesthetic that complements any vibe you're going for.
3. Cornrows
Known for their sleek appearance, cornrows involve braiding hair close to the scalp in straight lines or intricate patterns.
Step 1: Preparation:
- Begin with clean, well-conditioned hair. Cornrows are versatile, so this style works on various hair textures.
- Apply a light hair gel or styling cream to aid in smoother braiding.
Step 2: Sectioning:
- Determine your desired cornrow pattern. Whether it's straight back, a side-part, or intricate designs, section your hair accordingly.
Step 3: Braiding Technique:
- Start by sectioning a small piece of hair at the front and dividing it into three equal parts.
- Cross the right strand under the middle, then the left strand under the middle, repeating the process.
- As you continue, add small sections of hair from the scalp to each strand before crossing them. This creates the signature close-to-the-scalp appearance.
Step 4: Tension Matters:
- Maintain consistent tension to ensure a neat look without pulling too tight.
- Cornrows can be thick or thin, depending on your preference.
Step 5: Ends and Styling:
- Decide whether you want your cornrows to flow freely or be secured into a ponytail or bun.
- Seal the ends by braiding them or using rubber bands.
Tips and Tricks:
- Get endless styling opportunities with different cornrow patterns and shapes.
- Add beads or hair jewelry for a personalized touch.
- Keep your scalp clean and moisturized.
- Change up your cornrow style regularly to give your hair a break from consistent tension.
- Use a satin or silk scarf or bonnet at night to preserve the style.
Cornrows are a canvas for artistic expression. Whether you opt for a simple and sleek look or intricate designs, cornrows are a timeless choice that celebrates the beauty of black hair.
4. Ghana Braids
Ghana braids, also known as banana or pencil braids, feature thicker, cornrow-like braids with added extensions for a bold look.
Step 1: Preparation:
- Begin with clean, moisturized hair. Ghana braids work well on various textures and lengths.
- Apply a leave-in conditioner to ensure your hair is hydrated.
Step 2: Sectioning:
- Section your hair into rows or a desired pattern, determining the thickness of each braid.
- Ghana braids typically follow a straight or curved pattern, offering a versatile styling option.
Step 3: Braiding Technique:
- Start at the hairline or a designated starting point. Divide a small section into three parts.
- Begin braiding by crossing the outer strands over the middle, gradually incorporating additional hair as you move along the scalp.
Step 4: Adding Extensions:
- Optionally, add extensions for length and thickness. Ensure a seamless blend with your natural hair.
Step 5: Neat Finish:
- Keep the braids close to the scalp for a neat and polished look.
- Secure the ends by braiding or using rubber bands.
Tips and Tricks:
- Moisturize your scalp regularly to prevent dryness.
- Consider changing up the parting patterns for a versatile look.
- Ghana braids can last for weeks with proper care, making them a low-maintenance yet stylish option.
- Ghana braids can be worn in various styles, from updos to ponytails.
Ghana braids are a cultural statement and a versatile way to express your individuality. Whether you opt for a simple, uniform look or get innovation with intricate patterns, Ghana braids are a celebration of beauty and tradition.
5. Fulani Braids:
Inspired by the Fulani people, these braids often incorporate a distinctive pattern, with a central braid adorned with beads or accessories.
Step 1: Preparation:
- Begin with clean, stretched hair. Fulani braids often incorporate unique patterns and accessories.
- Apply a styling product to ensure smooth braiding.
Step 2: Sectioning:
- Create a central cornrow or a series of braids running down the center of your head.
- Part your hair to create side sections for additional braids or twists.
Step 3: Braiding Technique:
- Begin braiding the central cornrow or braids, incorporating extensions if desired.
- Add decorations like beads or cowrie shells for an authentic Fulani braids look.
Step 4: Side Braids or Twists:
- Braid or twist the side sections, incorporating extensions if you prefer.
- The beauty of Fulani braids lies in the intricate details and varied styling possibilities.
Tips and Tricks:
- Keep your scalp moisturized, paying attention to the central cornrow and parts.
- Ensure beads or accessories are not too tight to prevent breakage.
- Experiment with different bead colors and sizes for a customized look.
- Fulani braids can be styled into updos, ponytails, or left to flow freely.
Fulani braids offer a unique blend of tradition and modern style, making them a standout choice for those who love cultural diversity in their hairstyles. Whether adorned with beads or styled in various ways, Fulani braids are a celebration of heritage and beauty.
6. Bohemian Braids
Also known as goddess braids, bohemian braids feature a carefree, textured appearance with added curly bits for an ethereal vibe.
Step 1: Preparation:
- Begin with clean, dry hair. Bohemian braids, also known as goddess braids, often have a carefree, textured appearance.
- Apply a light styling product or leave-in conditioner to enhance texture.
Step 2: Sectioning:
- Part your hair into sections based on your preferred thickness for the braids.
- Bohemian braids embrace an effortless, laid-back look, so don't worry too much about perfectly uniform sections.
Step 3: Braiding Technique:
- Start braiding at the roots, ensuring a loose and relaxed grip.
- Add in extensions if you desire extra length or volume, allowing them to blend seamlessly with your natural hair.
- Integrate curly hair bits at different places along the length of the braid to achieve that distinctive bohemian, goddess-like appearance.
Step 4: Textured Finish:
- Unlike some traditional braids, Bohemian braids embrace a slightly messy and textured finish. Don't be afraid of a few loose strands or unevenness.
Tips and Tricks:
- Refresh your Bohemian braids by spritzing them with a water and leave-in conditioner mix.
- Embrace the carefree nature of Bohemian braids by allowing a few strands to frame your face.
- Bohemian braids look fantastic when worn down for a relaxed vibe.
- Experiment with accessories like headbands or scarves to enhance the boho-chic aesthetic.
Bohemian braids, also known as goddess braids, redefine the boundaries of braided hairstyles. These free-spirited and textured braids with added curly bits bring an ethereal and distinctive touch to your look. Perfect for those who want to embody a goddess-like vibe in their everyday style or special occasions.
7. Senegalese Twists:
A refined style, Senegalese twists involve twisting extensions with natural hair, creating sleek, uniform strands.
Step 1: Preparation:
- Begin with clean, detangled hair. Senegalese twists are known for their sleek, uniform appearance.
- Apply a styling product to ensure smooth twisting.
Step 2: Sectioning:
- Divide your hair into sections, choosing the size of the twists based on your preference.
- Senegalese twists can be small and intricate or larger for a bolder look.
Step 3: Twisting Technique:
- Start twisting at the roots, ensuring the twists are tight and neat.
- Add extensions as you twist, creating a seamless blend with your natural hair.
Step 4: Sleek Finish:
- Senegalese twists are celebrated for their sleek and polished finish. Keep the twists close to the scalp for a refined appearance.
Tips and Tricks:
- Moisturize your scalp regularly, especially if you have smaller twists.
- Wrap your twists with a satin or silk scarf at night to maintain their sleekness.
Senegalese twists exude a timeless charm that complements various styles and occasions. Whether you opt for a sophisticated updo or let them cascade freely, these twists are a versatile and chic choice for protective styling.
Glamorous Wigs and Extensions
When it comes to protective styling with a touch of glamour, wigs and extensions take center stage.
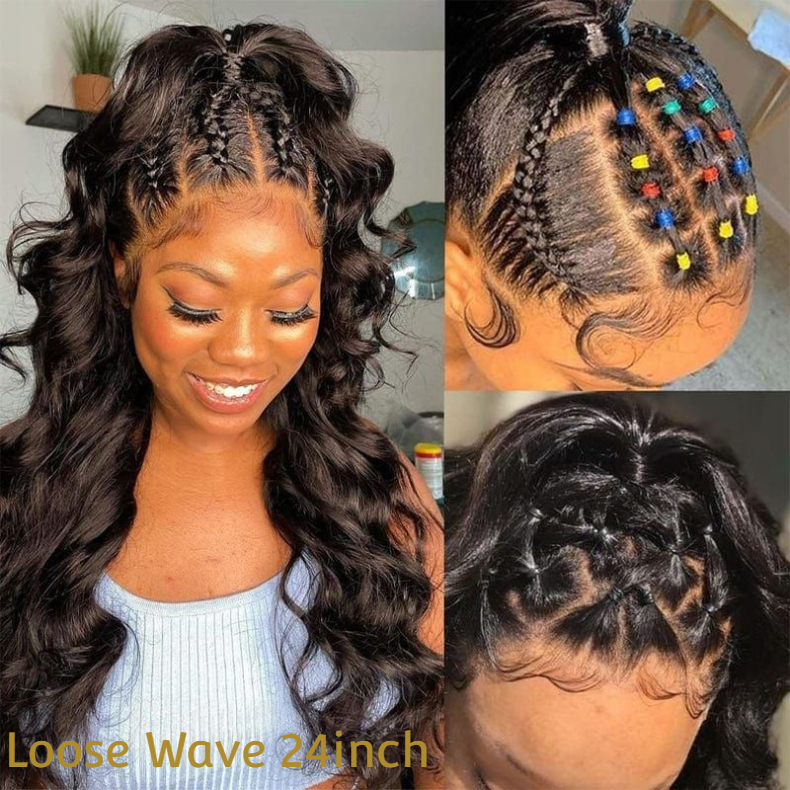
8. Lace Front Wigs:
Offering a realistic hairline, lace front wigs are crafted with strands hand-tied to a sheer lace base for a seamless and natural look.
Step 1: Prepping Your Hair:
- Before donning the wig, ensure your natural hair is clean, moisturized, and neatly secured. Braid or cornrow your hair, or use a wig cap to create a smooth base.
Step 2: Applying the Wig:
- If using adhesive, apply a thin layer along the hairline, following the manufacturer's instructions. Allow it to become tacky before placing the wig.
- Align the front edge of the wig with your natural hairline. Gently press down the lace to secure it. Adjust the wig to sit comfortably.
- Most lace front wigs come with adjustable straps, combs, or bands inside the cap. Adjust the straps to fit snugly around your head. Secure the combs into your braids or natural hair for added stability.
Step 3: Customizing the Hairline:
- Lace front wigs come with a sheer lace material at the front. Trim the excess lace to match your desired hairline for a more personalized and natural look.
Tips and Tricks:
- Invest in human hair lace front wigs for a more natural and comfortable experience.
- Keep the wig clean by washing it with a mild shampoo and conditioner as needed.
- Experiment with different parting styles for a fresh look.
- Use heat styling tools on low settings to achieve various hairstyles.
- Consider professional customization for a perfect fit.
Lace front wigs are a glamorous transformation. Whether you're after a sleek bob, flowing curls, or a trendy updo, lace front wigs offer a red-carpet-worthy appearance that's both stunning and protective. Embrace the versatility and beauty of lace front wigs as you redefine your style effortlessly.
9. Sew-In Weaves:
Sew-in weaves involve attaching extensions to braided natural hair, offering versatility and durability in various styles.
Step 1: Preparation:
- Start with clean, dry hair, ensuring it is well-detangled.
- Braid or cornrow your natural hair into a base pattern, providing a secure foundation for the weave.
Step 2: Weave Installation:
- Sew the weave onto the braided or cornrowed base, using a curved needle and weaving thread.
- Ensure the weave is evenly distributed, and the braids are covered for a natural appearance.
Tips and Tricks:
- Invest in human hair sew-in weave extensions for a more natural and comfortable experience.
- Avoid excessive pulling or tugging on the weave to prevent stress on your natural hair.
- Be cautious with heat styling to maintain the longevity of the weave.
- Consult with a professional stylist for proper installation.
Whether you're looking for a quick change or a longer-term transformation, sewing in weave provides versatility without compromising on style and glamour.
10. Quick Weave
A quick weave is a speedy yet fabulous way to transform your hairstyle without a long-term commitment. Follow these steps for a chic and time-efficient protective style.
Step 1: Prepare Your Hair:
- Begin with clean, dry hair. Ensure it's thoroughly detangled and moisturized.
- If you have longer hair, consider braiding it or creating a flat foundation to help the weave lay flatter.
Step 2: Protective Cap Application:
- Place a protective cap over your hair to shield it from the bonding glue used in the quick weave process.
- Adjust the cap to fit securely, ensuring your natural hair is entirely covered.
Step 3: Installation of Weave Tracks:
- Starting from the back, use hair bonding glue to attach weave tracks onto the cap.
- Work your way up, ensuring each track is securely bonded to create a seamless and natural look.
Step 4: Blending and Styling:
- Once all tracks are in place, blend your natural hair with the weave.
- Style your quick weave as desired – whether it's sleek and straight or bouncy curls.
Step 5: Finishing Touches:
- Trim and shape the weave to achieve your preferred length and style.
- Secure any loose ends or tracks with additional glue if needed.
Tips and Tricks:
- Choose a high-quality protective cap to prevent irritation and damage to your natural hair.
- Use bonding glue sparingly to avoid excessive buildup and potential damage during removal.
The quick weave is the go-to option for those who crave versatility without long-term commitment. With proper installation and care, this protective style can give you a stunning new look in no time.
11. Tape-In Hair Extensions:
Tape-in hair extensions offer a semi-permanent solution for adding length and volume to your natural hair. Here's a step-by-step guide to achieving a flawless tape-in extension installation.
Step 1: Selecting Quality Extensions:
- Choose high-quality, 100% human hair tape-in extensions that match your natural color and texture.
Step 2: Sectioning Your Hair:
- Divide your hair horizontally, creating a section where the tape-ins will be applied.
- Clip or tie up the upper section to keep it out of the way.
Step 3: Applying the Extensions:
- Starting from the lower section, peel the backing off the tape and sandwich a thin layer of your natural hair between two extension wefts.
- Press firmly to secure the extensions in place.
Step 4: Repeat the Process:
- Work your way up, section by section, applying the tape-in extensions.
- Ensure even spacing and alignment for a natural appearance.
Step 5: Blending and Styling:
- Once all extensions are applied, blend your natural hair with the extensions.
- Style your hair as desired, whether it's sleek and straight or luscious curls.
Tips and Tricks:
- Avoid applying heat directly to the tape tabs to prevent them from loosening.
- Use sulfate-free and extension-friendly hair products to maintain the integrity of the tape-in extensions.
- Be gentle when detangling and styling to prevent unnecessary stress on the tape tabs.
- Schedule regular maintenance appointments to adjust and reapply the tape-ins as your natural hair grows.
Tape-in hair extensions provide a seamless blend and natural movement, making them a favorite among those seeking a semi-permanent extension solution.
12. Clip-In Hair Extensions
Clip-in hair extensions are a versatile and easy way to add instant length, volume, and dimension to your natural hair. Here's a straightforward guide to achieving a flawless clip-in extension application.
Step 1: Selecting Quality Extensions:
- Choose high-quality, 100% human hair clip-in extensions that match your natural color and texture for a seamless blend.
Step 2: Sectioning Your Hair:
- Part your hair horizontally, creating a section where the clip-ins will be applied.
- Clip or tie up the upper section to keep it out of the way.
Step 3: Preparing the Extensions:
- Open the clips on each weft of the clip-in extensions.
- If your set includes various weft sizes, start with the wider wefts at the back and the smaller ones towards the front.
Step 4: Applying the Extensions:
- Beginning at the nape of your neck, align the top of the weft with the parting and snap the clips shut.
- Continue adding extensions, working your way up towards the crown of your head.
Step 5: Blending and Styling:
- Once all clip-ins are in place, gently comb through your natural hair to blend it with the extensions.
- Style your hair as desired, whether it's straight, curled, or in an updo.
Step 6: Secure the Top Section:
- Unclip or release the top section of your hair.
- Create a new part just above the attached extensions, and repeat the process of applying the clip-ins.
Step 7: Final Blending and Styling:
- Comb through all your hair, ensuring a seamless blend between your natural hair and the clip-in extensions.
- Style your hair as desired, and use heat tools if needed.
Tips and Tricks:
- Trim the extensions if necessary to blend with your desired length.
- Experiment with different placement and layering for a customized look.
Clip-in hair extensions are perfect for those who want the flexibility of longer or fuller hair without a long-term commitment.
Maintenance and Care Tips for Braids and Twists:
- Keep Your Scalp Hydrated: Moisturize your scalp regularly using a lightweight oil or a braid spray to prevent dryness and itching.
- Gentle Cleansing: Cleanse your scalp regularly with a diluted shampoo or a cleansing spray to remove buildup without compromising your hairstyle.
- Protective Styling at Night: Wrap your braids or twists with a satin or silk scarf before bedtime to reduce friction and prevent frizz.
- Avoid Excessive Pulling: Refrain from pulling or tugging on your braids or twists excessively to prevent unnecessary stress on your hair.
- Refresh Your Style: Extend the lifespan of your braids or twists by refreshing them with a braid spray or by re-braiding any loose or frizzy sections.
- Scalp Massage: Pamper your scalp with gentle massages to stimulate blood flow, promoting a healthy environment for hair growth.
Ula Hair's Premium Human Hair for Protective Styling
At Ula Hair, we understand that achieving stunning and protective hairstyles requires the finest quality human hair. Our range of human hair wigs and extensions is meticulously crafted to not only enhance your style but also prioritize the health and longevity of your natural hair.
Why Choose Ula Hair for Protective Styling?
- Uncompromising Quality: Our commitment to quality is unwavering. Ula Hair's human hair wigs and extensions are sourced from the finest sources, ensuring each strand meets our high standards.
- Diverse Styles and Textures: Whether you prefer sleek and straight, bouncy curls, or textured braids, Ula Hair offers a diverse range of styles and textures to suit your unique preferences.
- Longevity and Durability: Invest in protective styles that stand the test of time. Ula Hair's human hair wigs and extensions are crafted to be durable, ensuring they maintain their luster and vitality wear after wear.
Ula Hair Reviews:
"These bundles are everything. The hair was true to length and had lil to no shedding. Get these bundles, ladies."--Ray***
"I love this hair for the price. I have been wearing this hair for a month and it is still good. The vendor was friendly, communicated well, and my hair arrived in 2 days. All in all, I’ll be buying from Ula going forward!"--Chr***
"After having this for a couple of weeks, by far my favorite bundles ever!!! definitely will purchase again"--Sie***
"Nice body wave, no shading, tangle free, true to its size. I was scared at first but babyyy when it got here I was not disappointed!"--Jan***
"True to length great value for the price, because hair is soft beautiful easy to put on. I didn’t have to bleach or pluck the wig. It was so ready for install. I definitely buy this company hair again"--Jov***
Conclusion:
Protective hairstyles for black women offer a multitude of benefits, from preserving natural hair health to providing styling versatility with low maintenance. Ula Hair's premium human hair collection stands as a beacon of unmatched quality, diverse styling options, and lasting durability.
Experiment with different looks, celebrate versatility, and let Ula Hair be your partner in self-expression. Transform your protective styling with confidence. Explore Ula Hair's premium human hair wigs and extensions online. Redefine your beauty effortlessly.
Your style evolution starts here. Visit ulahair.com now.
Related Articles:
6 Protective Hairstyles Recommended For 4C Hair
Popular Jumbo Braid Styles: Elevate Your Look
Elevate Your Look with Boho Knotless Braids
Rock Your Braiding Game: Ula Hair's Superior Quality Bulk Human Hair