 USD
USD EUR
EUR GBP
GBP CAD
CAD AUD
AUD
22 Gorgeous Sew-In Hairstyles You Shouldn't Miss In 2023
Sew-in hairstyles have gained immense popularity in recent years as a go-to choice for both fashionistas and those seeking a protective styling option. This versatile method involves attaching extensions to the natural hair using a needle and thread, resulting in a seamless and long-lasting look. With sew-in hairstyles, you can effortlessly transform your appearance, experiment with various textures and lengths, and even enhance your natural hair's health and growth. Whether you desire voluminous curls, sleek straight strands, or trendy braided styles, sew-in hair offers endless possibilities to express your unique style. Moreover, these hairstyles protect your natural hair by minimizing exposure to damaging factors like heat, manipulation, and environmental stressors. Join us as we explore the world of sew-in hairstyles, from the different installation techniques to a gallery of stunning looks, and discover how you can achieve your dream hairstyle while keeping your tresses healthy and glamorous.
What is sew-in hair?
Sew-in hair is a method of applying extensions by sewing them onto natural hair. The process involves braiding the natural hair and then sewing wefts of hair extensions onto the braids using a needle and thread. This creates a foundation for attaching the extensions securely. Sew-in hair allows for versatility in texture, length, and style, with options for different types of hair and colors. It serves as a protective style, keeping the natural hair braided and shielded underneath the extensions, while still providing the opportunity to achieve various stunning hairstyles.

Does sew-in weave damage your natural hair?
While sew-in weaves can be a fantastic styling option, it's essential to understand the potential risks and factors that can contribute to hair damage.
One risk is tight installations, which can cause traction alopecia. To avoid this, work with an experienced stylist who can ensure a secure but gentle installation.
Buildup underneath the extensions can lead to scalp issues. Regular cleansing using diluted shampoos is important to prevent irritation and infections.
Improper removal can also cause damage. However, with proper care and precautions, you can minimize these risks and maintain the health of your natural hair while wearing sew-in extensions.
Step-by-step instruction: How to do sew-in hair?
Installing sew-in hair requires careful attention to detail and a systematic approach. Follow these step-by-step instructions to achieve a seamless and long-lasting result:
Materials and Tools Needed:
- Hair extensions (wefts or tracks)
- Weaving needle
- Strong thread
- Rat tail comb
- Sectioning clips
- Hair scissors
- Hair clips
- Wig cap or stocking cap (optional)
- Hair moisturizer or leave-in conditioner
- Styling products (optional)
Step 1: Prepare Your Natural Hair
- Start with clean and conditioned hair.
- Detangle your natural hair using a wide-tooth comb or your fingers.
- Create a parting where you want the sew-in hair to begin.
Step 2: Section Your Hair
- Divide your hair into manageable sections using sectioning clips.
- Leave out a small portion of hair at the front if you want a natural-looking hairline.
Step 3: Braid Your Natural Hair
- Take a small section of hair at the nape of your neck and begin braiding.
- Continue braiding until you reach the end of the section, keeping the braids close to your scalp.
- Repeat this process for each section, making sure the braids are even and consistent in size.
Step 4: Prepare the Extensions
- Measure the hair extensions against the braided sections, cutting them to the desired length.
- Lay out the wefts or tracks of hair extensions in the order you plan to sew them in.
Step 5: Sew in the Extensions
- Thread the weaving needle with a strong thread, double-knotting the end.
- Starting at the nape of your neck, position the first weft of hair extensions against the braids.
- Insert the needle under the braid, sewing through the weft and the braid.
- Continue sewing along the braid, securing the weft with evenly spaced stitches.
- Once you reach the end, secure the thread with a double knot and trim any excess.
Step 6: Repeat the Process
- Move up to the next section of braided hair.
- Repeat the sewing process, ensuring the wefts are aligned and tightly attached to the braids.
- Continue working your way up until all sections are completed.
Step 7: Style and Blend
- Once all the wefts are sewn in, release the remaining natural hair.
- Blend the natural hair with the extensions, using styling techniques such as flat ironing or curling to achieve a seamless look.
Step 8: Final Touches
- Trim any excess thread or stray hairs for a polished finish.
- Apply a small amount of hair moisturizer or leave-in conditioner to keep the extensions and natural hair hydrated.
Tips and Techniques for a Seamless and Long-Lasting Result:
- Avoid sewing the extensions too tightly, as it can cause discomfort and damage to your natural hair.
- Use a mirror or ask for assistance to ensure the wefts are aligned and evenly spaced.
- Opt for high-quality human hair extensions that closely match your natural hair texture and color for a more seamless blend.
- Consider using a wig cap or stocking cap to create a smoother base and protect your natural hair.
- Secure the wefts close to the roots but avoid sewing through the scalp to prevent irritation.
- To maintain the sew-in, avoid excessive manipulation and use gentle styling techniques.
By following these step-by-step instructions and implementing the tips and techniques, you can achieve a flawless sew-in hairstyle that blends seamlessly with your natural hair and lasts for an extended period.
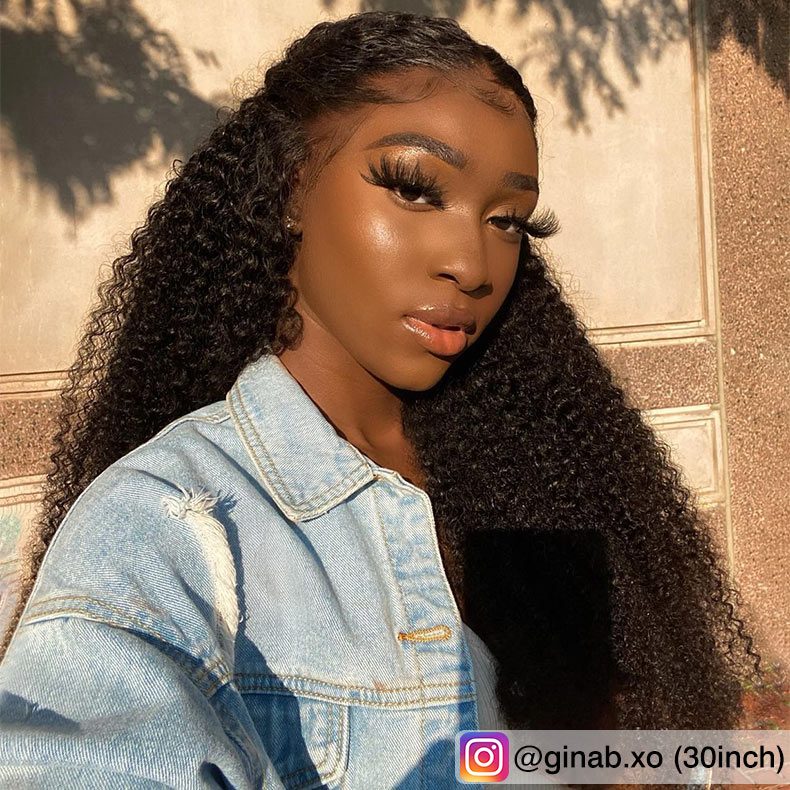
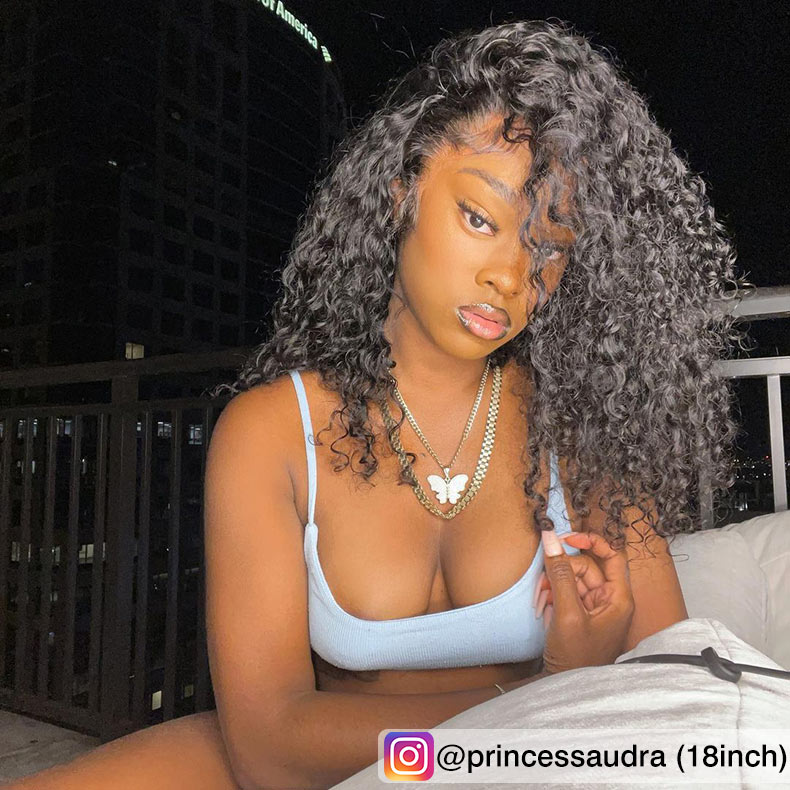
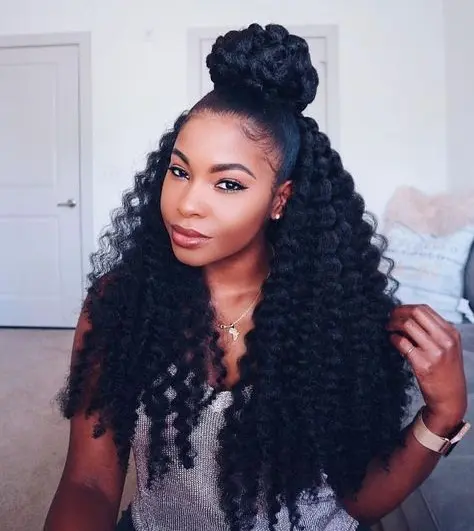
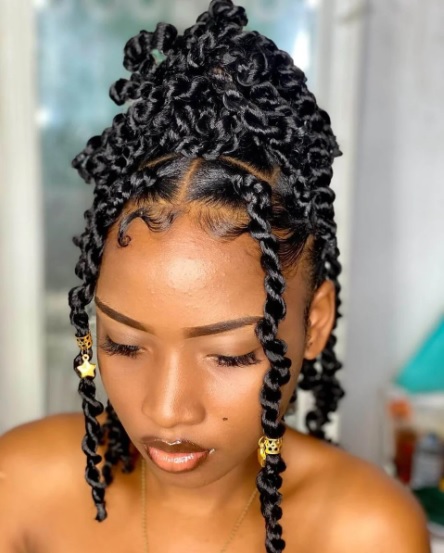
22 chic sew-in hairstyles for your inspiration
In search of a fresh and versatile hairstyle? Look no further than sew-in hairstyles! sew-in hairstyles offer endless possibilities for transforming your look. From sleek and straight to voluminous curls, there's a sew-in style to suit every taste and occasion. In this section, we present 22 chic sew-in hairstyles that will inspire your hairstyle.
-
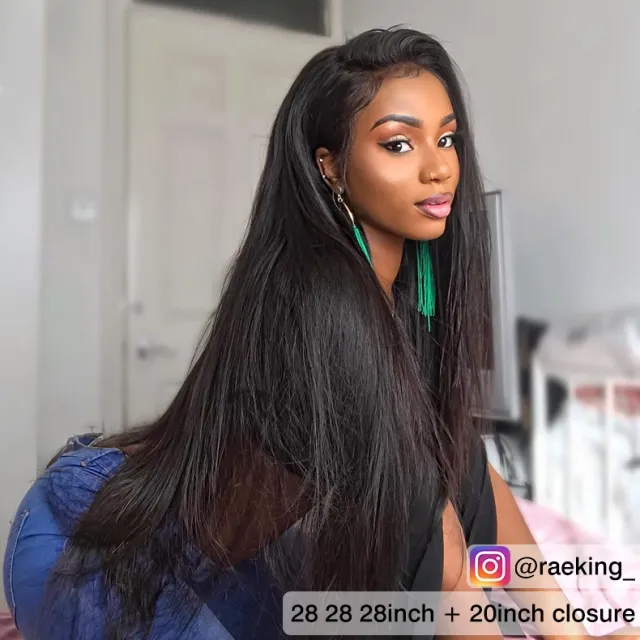
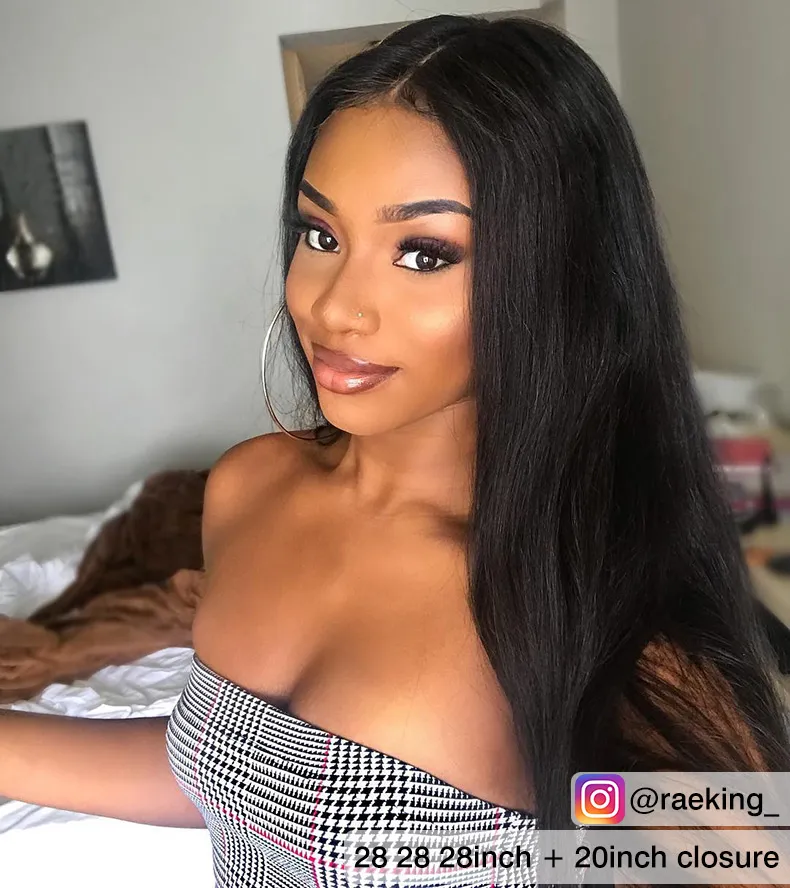
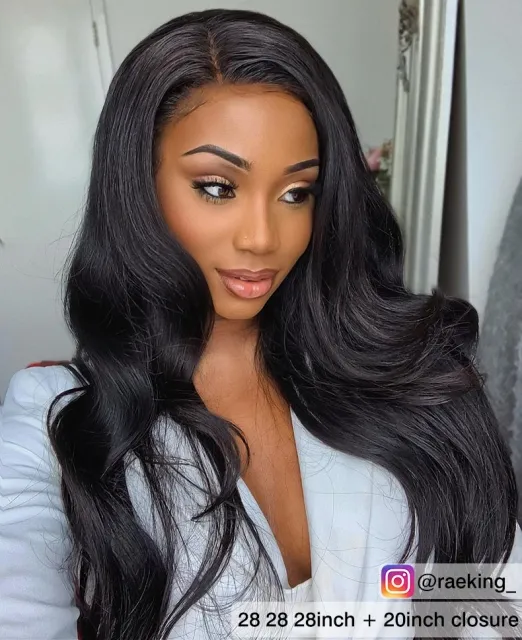
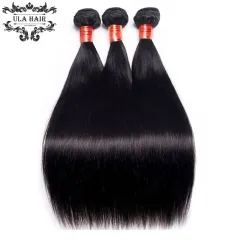
Long & Straight Side Part Sew-In: Achieve a sleek and sophisticated look with long, straight hair parted to the side. Use a flat iron for a super smooth finish.
-
Sleek Straight Middle Part Sew-In: Create a classic and elegant style with a middle part and silky straight hair. Apply a heat protectant before using a flat iron to ensure a sleek result.
-
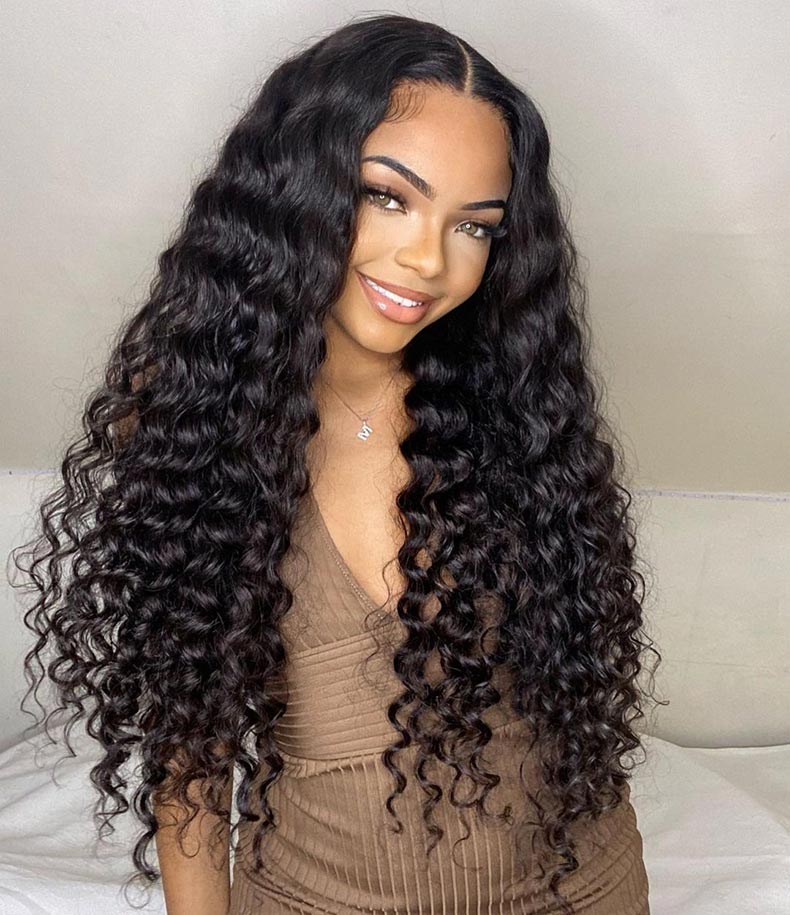
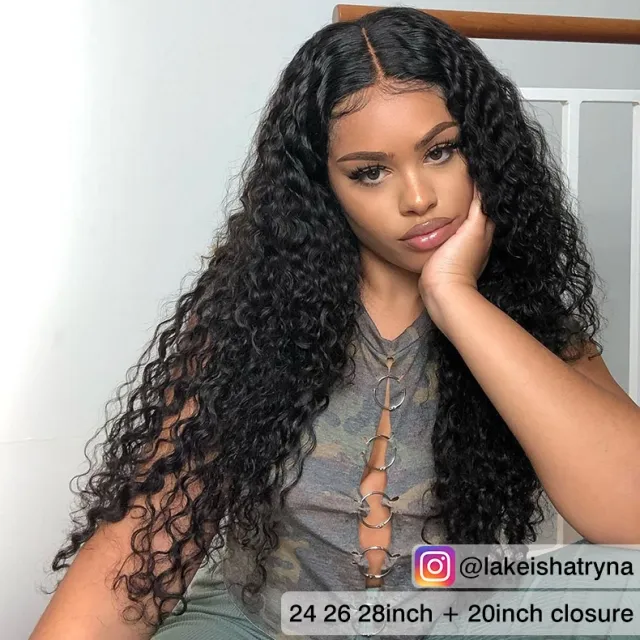
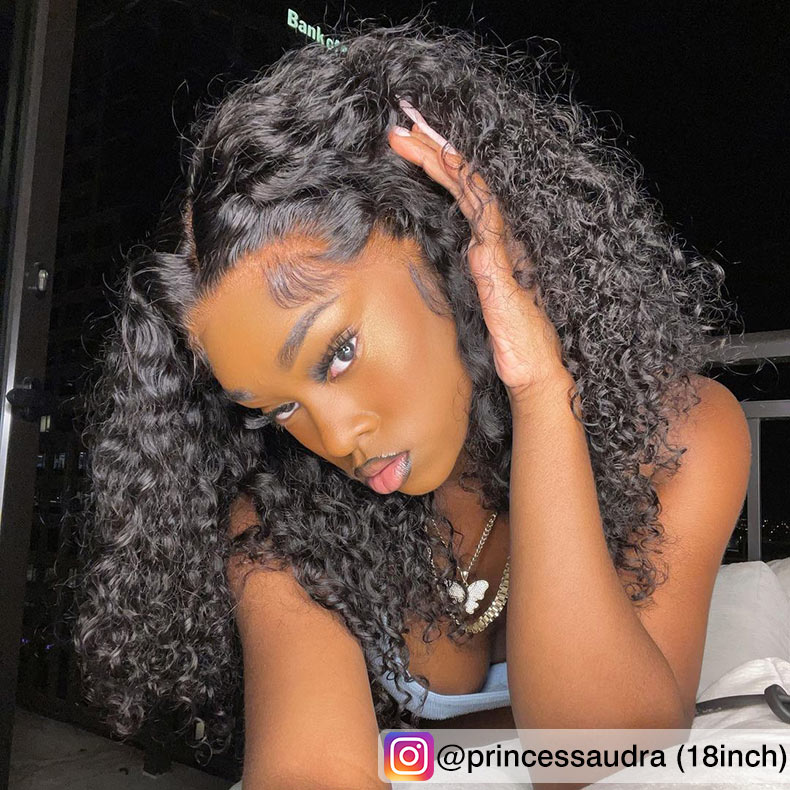
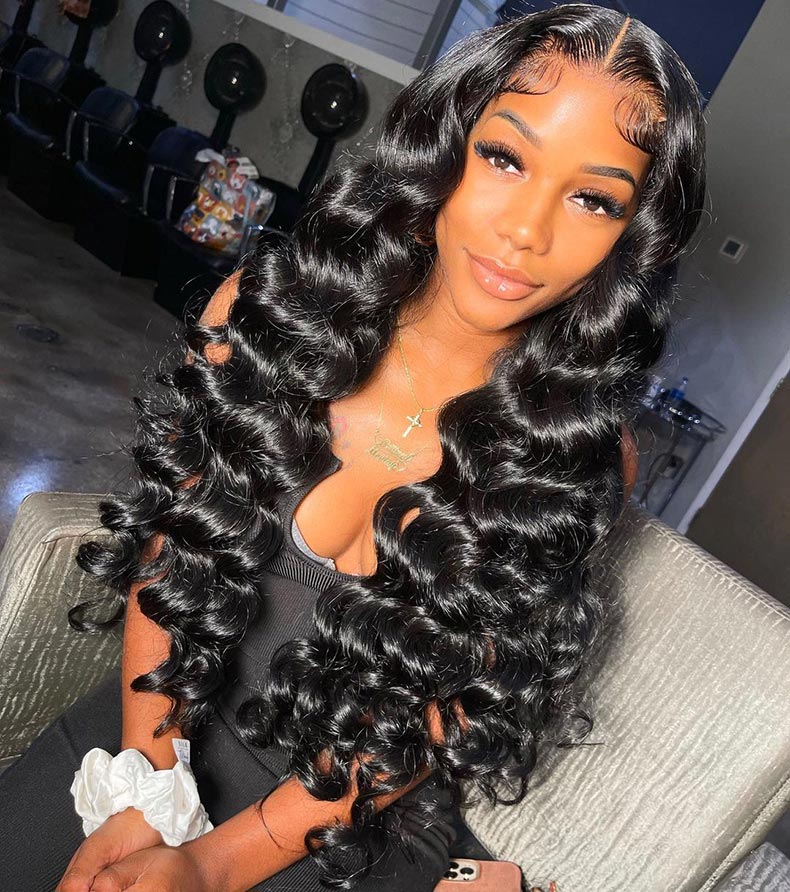
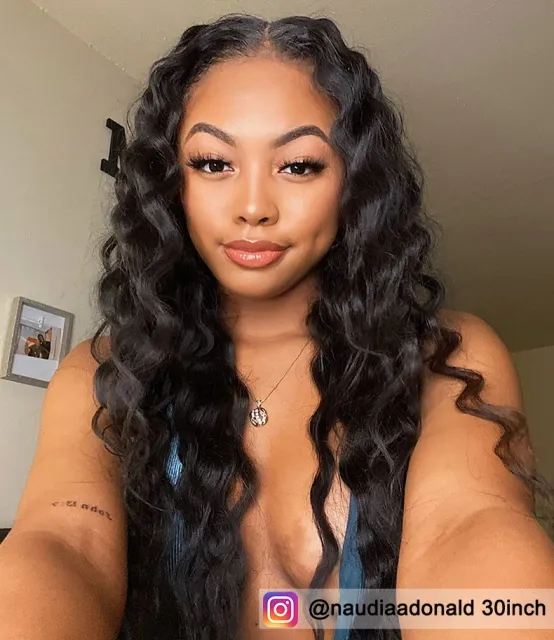
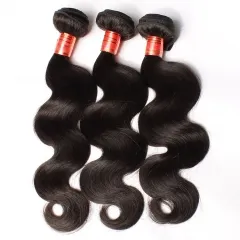
Natural and Full Curls: Embrace your natural texture by installing a sew-in with voluminous and bouncy curls. Use a curl-defining product to enhance and define your curls.
-
Chic Bob: Opt for a stylish and versatile bob hairstyle with a sew-in. Customize the length and add layers for a trendy and modern look.
-
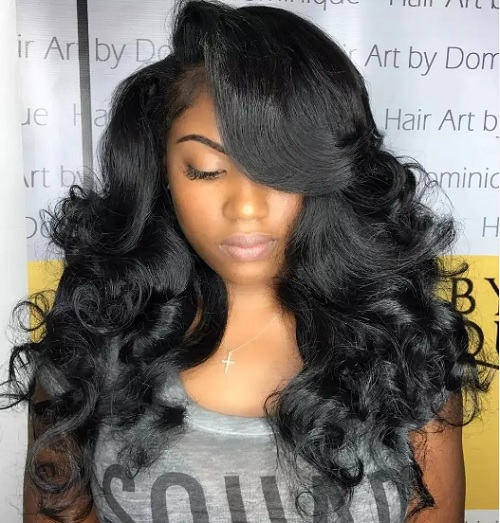
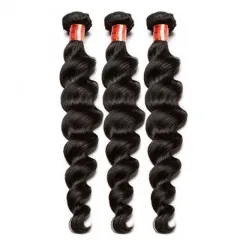
Feminine Long Wavy Hair: Create a soft and romantic look with long wavy hair. Use a curling wand or rollers to achieve loose, cascading waves.

-
Wavy with Swoopy Bangs: Add flair to your sew-in with wavy hair and swoopy bangs. The waves add texture and movement, while the bangs frame the face beautifully.
-
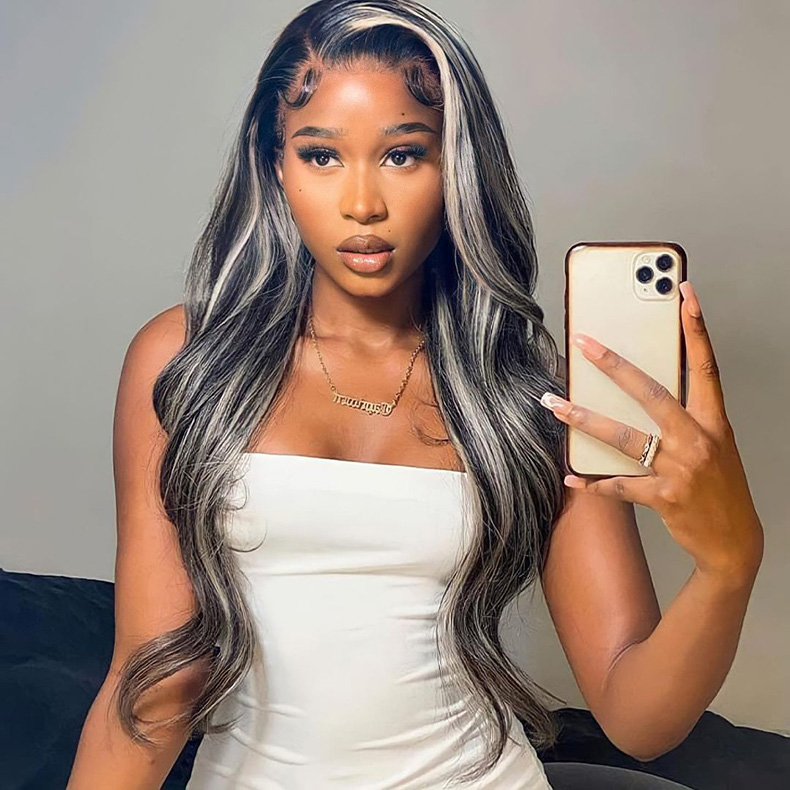
Sew-In with Highlights: Elevate your sew-in with highlights for dimension and depth. Choose shades that complement your skin tone and hair color for a natural-looking result.
-
Layered Sew-In: Add layers to your sew-in hairstyle for adding movement and volume. Layers can give the illusion of more natural-looking hair and add texture to your style.
-
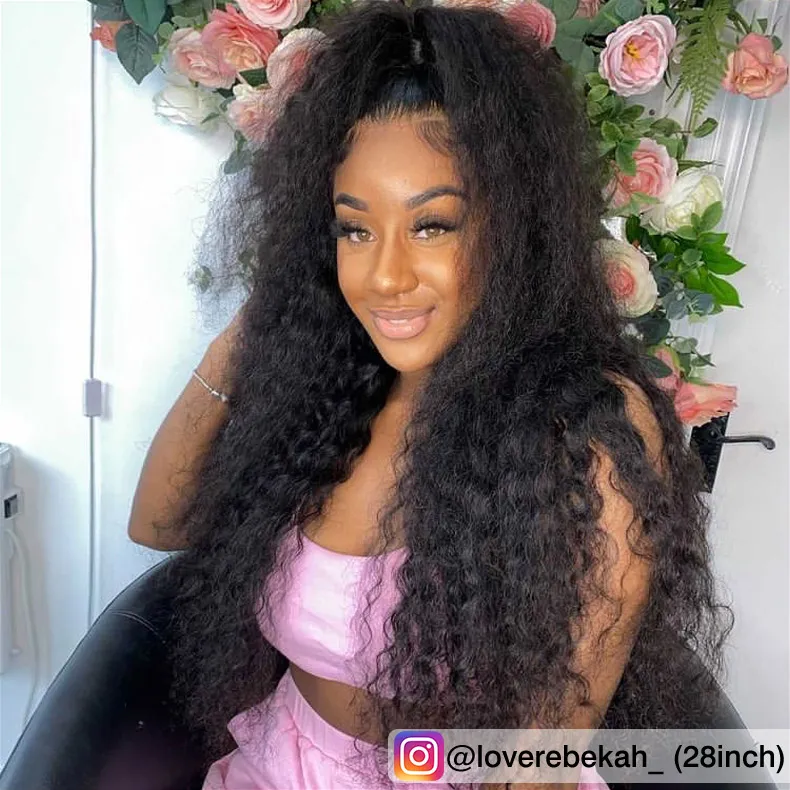
Wet and Wavy Hair: Achieve a beachy and effortless look with wet and wavy hair. Apply a curl-enhancing product and scrunch the hair for a tousled, beach-inspired style.
-
Sew-In with Leave-Out: Blend your natural hair with extensions by leaving out a portion of your own hair. This allows for a more natural blending.
-
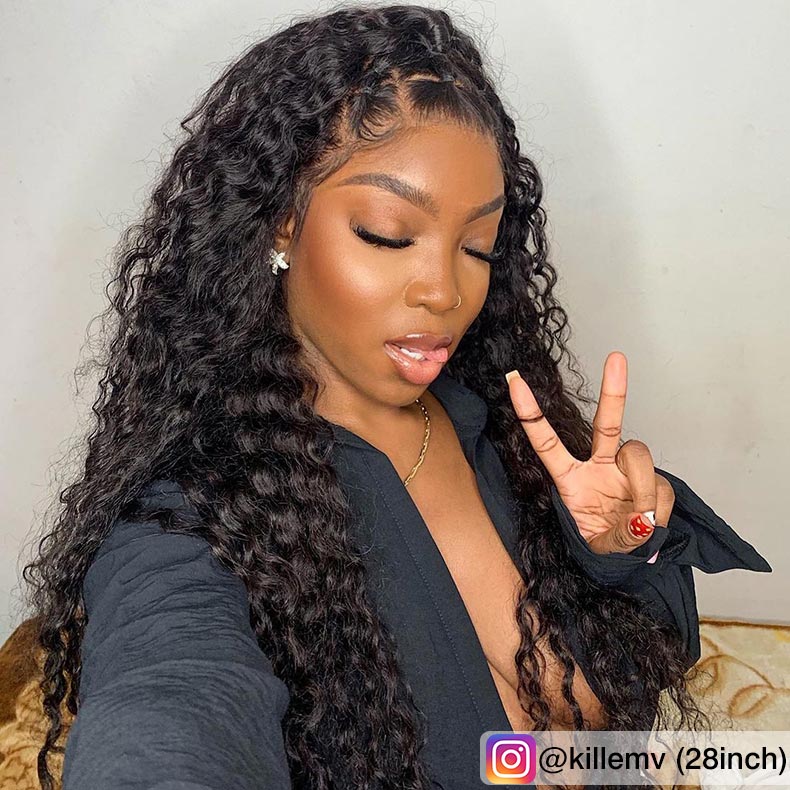
Deep Wave Sew-In Hair with Half-Up Ponytail: Create a glamorous and playful style by installing deep wave sew-in hair. Gather the top half of the hair into a high ponytail for an elegant yet fun look.
-
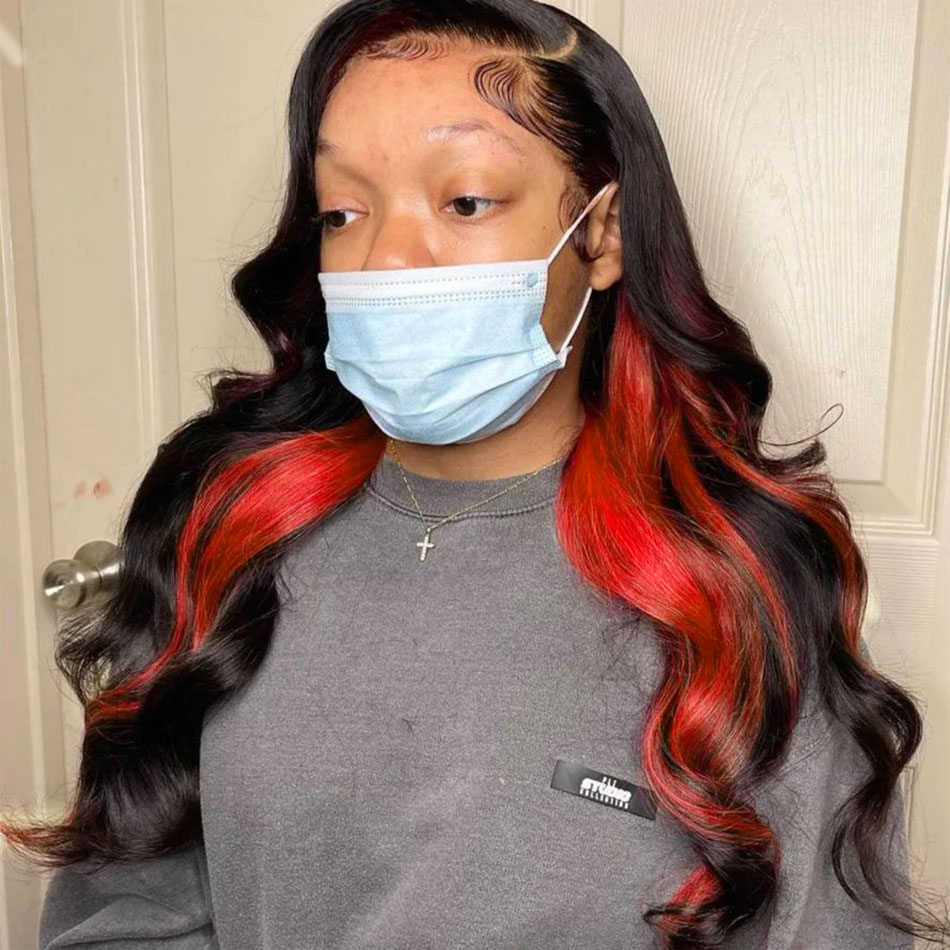
Chic Peekaboo Sew-In Style: Add a pop of color or contrasting texture by incorporating peekaboo sections of hair extensions. This creates visual interest and a unique touch to your sew-in hairstyle.
-
Straight High Ponytail: Achieve a sleek and polished look with a high ponytail. Gather all the hair and secure it with a hair tie, using extensions to add length and fullness.

-
Ombre Sew-In Style: Embrace the ombre trend by installing a sew-in with different shades blending from dark to light. This creates a gradient effect and adds dimension to your hairstyle.
-
Beach Waves Sew-In: Get that effortless, beachy vibe with sew-in hair styled in loose and tousled waves. Use a texturizing spray for added texture and a windswept look.
-
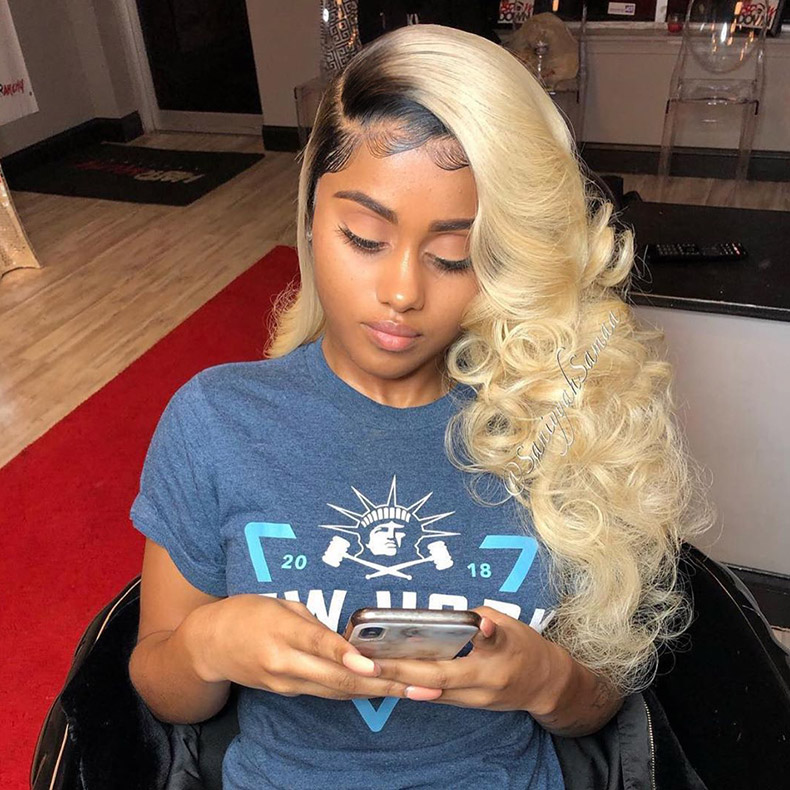
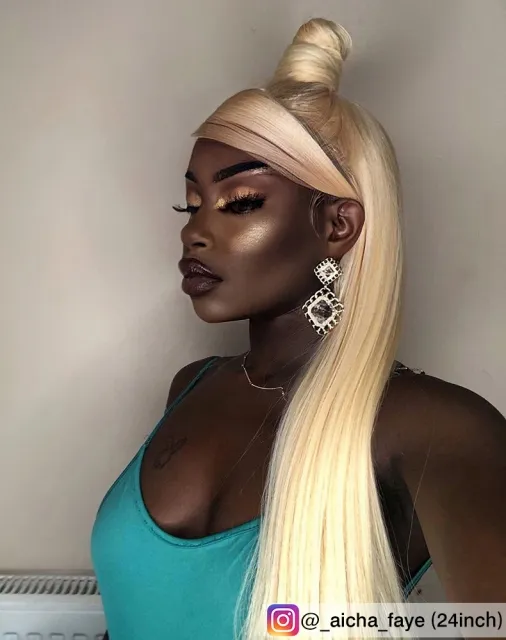
Bold Blonde Sew-In: Make a statement with a bold and vibrant blonde sew-in hairstyle. Choose a shade that complements your skin tone and adds a touch of confidence to your look.
-
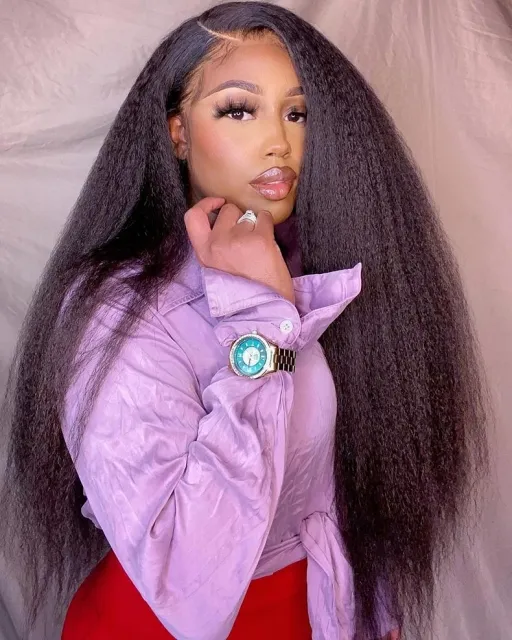
Kinky Straight Sew-In: Rock a chic and edgy style with kinky straight sew-in hair. This texture adds a touch of uniqueness and can be straightened or curled for different looks.
-
Voluminous Natural Curls: Create head-turning volume with a sew-in featuring natural, voluminous curls. Enhance the curls with a diffuser or use large rollers for added bounce.
-
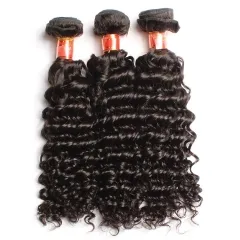
Mid-Length Kinky Curls: Embrace the beauty of mid-length kinky curls for a fun and lively sew-in hairstyle. Use a curl-enhancing product and finger coil the hair.
-
Textured Updo: Create an elegant and sophisticated updo with textured sew-in hair. Gather the hair into a bun, twist, or braided style for a stunning and polished look.
-
Crochet Braids: Embrace a trendy and protective style with crochet braids. Install pre-braided or pre-twisted extensions using a crochet hook, creating a variety of textures and styles, including curly, wavy, or braided looks.
-
Faux Locs: Achieve the look of natural locs without the commitment by installing faux locs as a sew-in hairstyle. Use synthetic or human hair extensions to create beautiful and low-maintenance locs in various lengths and thicknesses.


These 22 sew-in hairstyles offer a range of options to suit different preferences and occasions. Whether you prefer sleek and straight, curly and voluminous, or intricate updos, sew-in hairstyles provide versatility and the opportunity to experiment with various looks.
Tips and tricks for sew-in hair routine
Tip 1: Use a gentle sulfate-free shampoo and a moisturizing conditioner to cleanse and nourish your sew-in hair. Be careful not to scrub vigorously, as this can cause tangling. Focus on the scalp area to keep it clean and healthy.
Tip 2: Keep your scalp clean and moisturized by using a diluted mixture of shampoo and water, or a scalp cleanser, to gently cleanse between the tracks of the sew-in. Avoid excessive scratching or pulling on the braids or wefts to prevent irritation.
Tip 3: Before washing or styling, gently detangle your sew-in hair using a wide-toothed comb or a detangling brush. Start from the ends and work your way up to minimize pulling or tugging, which can lead to shedding or breakage.
Tip 4: When styling your sew-in, avoid excessive heat, as it can cause damage. Opt for heatless styling methods like flexi-rods, Bantu knots, or twist-outs to achieve curls or waves. If using heat tools, use a heat protectant spray and set them to a moderate temperature.
Tip 5: Before going to bed, wrap your hair with a silk or satin scarf or sleep on a satin pillowcase to minimize friction and prevent tangling. Consider braiding or twisting your hair to keep it contained and protected while you sleep.
Tip 6: If you're engaging in physical activities or workouts, consider tying your sew-in hair in a bun or a ponytail to keep it secure. Use a sweatband or a headband to absorb sweat and keep it away from your scalp.
Tip 7: Schedule regular touch-up appointments with a professional stylist to ensure the sew-in remains secure and to maintain the overall health of your natural hair. This will also help prevent tangling and matting at the root.
Tip 8: Keep your sew-in hair moisturized by applying a lightweight leave-in conditioner or hair oil to the lengths and ends. Avoid applying products directly to the scalp to prevent product buildup.
Tip 9: Limit the use of heavy styling products, excessive brushing, or tight hairstyles that can strain the hair and cause tension on the scalp. Give your hair and scalp breaks in between styles to promote healthy growth.
Tip 10: Treat your sew-in hair with care and avoid excessive pulling, tugging, or rough handling. This will help maintain the integrity of the style and minimize hair breakage or shedding.
By following these tips and tricks, you can ensure that your sew-in hair routine promotes the health of your natural hair, prevents tangling, and allows for long-lasting, beautiful styles. With proper care, your sew-in hairstyle will stay looking fabulous and fresh.
Sew-in Hair FAQs:
Q: How long does a sew-in take to install?
A: The installation time for a sew-in can vary depending on the complexity of the style and the skill level of the stylist. On average, it can take anywhere from 2 to 4 hours to install a sew-in hairstyle.
Q: How long does a sew-in last?
A: A sew-in can typically last for 6 to 8 weeks. However, it's important to note that the duration can vary based on factors such as the quality of the installation, the type of hair used, and how well you care for the sew-in.
Q: How much should a sew-in cost?
A: The cost of a sew-in can vary depending on various factors such as the location, the salon or stylist, the type and quality of hair extensions used, and the complexity of the style. On average, a sew-in can range anywhere from $100 to $500 or more.
Q: What type of hair do you need for a sew-in?
A: For a sew-in, you can use either human hair or synthetic hair extensions. Human hair provides a more natural and versatile look, while synthetic hair is more affordable. It's important to choose high-quality hair that matches your desired texture and blends well with your natural hair.
Q: Can you swim with a sew-in?
A: Swimming with a sew-in hairstyle is generally not recommended, especially in chlorinated pools or saltwater. The chemicals and water can cause damage to the extensions and affect the integrity of the style. It's best to protect your sew-in by wearing a swim cap or avoiding submerging your head in the water.
Q: How do you make a sew-in look natural?
A: To make a sew-in look natural, consider factors such as hair texture, color, and styling. Ensure that the extensions match your natural hair color and texture. Opt for styles that blend well with your hairline and use techniques like leaving out a small section of your natural hair for a more seamless and realistic look.
Q: Can you sleep with a sew-in?
A: Yes, you can sleep with a sew-in. It's recommended to protect your sew-in by wrapping your hair with a silk or satin scarf or sleeping on a satin pillowcase. This helps to minimize friction and tangling while you sleep.
Q: How often should you tighten or re-install a sew-in?
A: The frequency of tightening or re-installing a sew-in depends on various factors such as hair growth, the quality of the installation, and how well you maintain the style. On average, it's recommended to have a sew-in tightened or re-installed every 4 to 6 weeks to ensure it remains secure and undamaged.
Q: Can you dye or style sew-in hair?
A: Yes, you can dye or style sew-in hair, especially if it's made of human hair. However, it's important to exercise caution and consult a professional stylist to ensure that the dye or heat styling methods are appropriate for the specific type of hair extensions you have.
Q: What should you do if your sew-in becomes itchy?
A: If your sew-in becomes itchy, it may be due to a buildup of product or sweat on the scalp. Gently cleanse the scalp using a diluted mixture of shampoo and water or a scalp cleanser. Avoid scratching or excessive rubbing, as it can lead to irritation or damage. If the itching persists or becomes severe, consult a professional stylist for further guidance.
Conclusion:
Sew-in hairstyles offer a versatile and protective option for transforming your look and achieving various styles, lengths, and textures. We've covered the basics of sew-in hair, including installation, care tips, and hairstyle ideas. By following the provided advice, you can keep your hair healthy and enjoy your sew-in for weeks.
Now it's time for you to explore the world of sew-in hairstyles. Discover a wide range of high-quality human hair weaves for sew-ins at ulahair.com. Browse through their collection to find the perfect match for your desired style and texture. With Ula Hair, you can embrace the versatility and beauty of sew-in hairstyles while keeping your natural hair protected and healthy.
Start your journey to fabulous sew-in hairstyles today. Unleash your creativity with stunning sew-in hairstyles. Get ready to turn heads and rock your new look with confidence!
 50%
50%
OFF Sale-
$59.60
$119.20(2073) (1348)

 50%
50%
OFF Sale-
$59.60
$119.20(1744) (2715)

 50%
50%
OFF Sale-
$62.60
$125.20(2879) (1368)

 50%
50%
OFF Sale-
$62.60
$125.20(316) (286)

 40%
40%
OFF Sale-
$84.45
$141.03(1327) (1100)

 40%
40%
OFF Sale-
$84.45
$141.03(1600) (712)

 40%
40%
OFF Sale-
$207.88
$347.16(2038) (1126)

 40%
40%
OFF Sale-
$207.88
$347.16(2020) (1180)

Related Posts:
Things to know about sew-in hair extensions