 USD
USD EUR
EUR GBP
GBP CAD
CAD AUD
AUD
How To Half Up Half Down Quick Weave?
How to half up half down quick weave?
What is a quick weave?
Quick weave, also known as glue-in weaves, is a weaving technique to glue down hair weaves to a protective wig cap to achieve a fuller and thicker hair look. This weaving technique is quite simple that allows the wearer to DIY at home, even for a beginner. We have made a more detailed introduction to the quick weave technique in our previous post: A Comprehensive Guide To Quick Weave. Click and read more.
What is a half-up half-down quick weave?
A half up half down quick weave is to section your hair into two parts and pull the upper section of real hair into a ponytail or a bun. While the bottom section of hair is braided and covered under a wig cap to attach hair weaves. This hairstyle subtly conceals the traces of hair weave and helps to achieve a more seamless and voluminous hair look. What's more, it's easy and quick to operate and allows you to slay at home.
How many bundles do you need for a half-up half-down quick weave?
3-4 Bundles are recommended for a full hair look. For half up half down style, typically, 2-3 bundles are enough.
Tutorial: half-up half-down quick weave
Half up half down quick weave
What you need:
Shampoo and conditioner;
Hairdryer;
A wide-tooth comb;
Clips or rubber bands;
Human hair weaves (Opt for hair extensions that are similar to your natural hair in texture and color);
Wig cap (Opt for a wig cap that has a similar color to your natural hair or your hair weaves);
Got2b spray;
A pair of scissors;
Step 1: Preparation
Shampoo and condition your hair as you normally would. Detangle your natural hair and your hair extensions with a wide-tooth comb.
Step 2: Section your hair
Create a horizontal part from ear to ear across with your fingers or a rattail comb. Clip the upper section of hair up so that it won't disturb the following procedure. Don't forget to leave out your baby hair around your hairline.
Step 3: Make cornrows
Braid the bottom section of natural hair into cornrows. Make the cornrows as flat as possible but not so tight. Secure the cornrows with rubber bands. Stuff the tails of the cornrows into the gap between the cornrows to achieve a more flat base. If your natural hair is very short that can hardly be cornrowed, use molding gel to slick back instead.
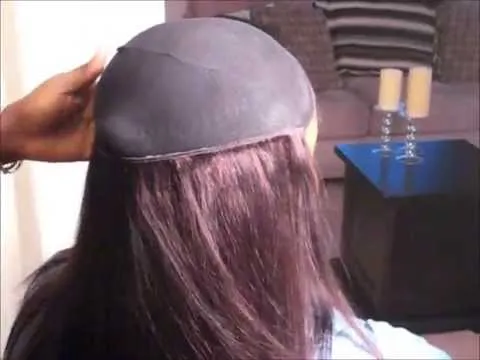
Step 4: Put on a wig cap
Put on a protective wig cap and stuff all your bottom section of hair is covered under the wig cap. Or you can put on two wig caps to protect your natural hair from getting coated. Give each of your protective caps a Got2b spray to create an extra barrier. Blow it dry with the lowest heat setting.
Step 5: Glue in hair weaves
Grab a hair weave and spread some glue on the roots of the weft. Glue down the hair weft at the bottom track (on top of your nape) horizontally. Press down the hair weft for 20-30 seconds until the glue is dry and the hair weft is firmly bonded to your wig cap. Repeat and go ahead to glue in hair wefts row by row until you have finished the bottom section.
Step 6: Cut the wig cap
Cut the wig cap with a pair of sharp scissors along the part line you just made in Step 2. Be mind avoid cutting the weft.
Step 7: Style your hair
Gently detangle your hair weave with your fingers. Updo the upper section of natural hair. You can straighten or curl your hair with your styling tools to create a natural blend. Apply a small amount of edge control around your hairline to slick back your natural hair. Pull the upper section of hair into a ponytail. Ensure the weave is perfectly covered by your natural hair to achieve a seamless result.
Here is a video tutorial for you:
FAQs about the quick weave routine:
Q: Can I swim with a quick weave?
A: Actually, you'd better stay out of the pool and ocean with glue-in weaves installed. Since chlorine and salt can strip off the oil from your hair extensions and lead to hair frizz and shed. If you have to dive into the pool with your glue-in weaves on, make sure your bonding glue is water-proof to avoid the embarrassment of slide-off. Put on a swimming cap in advance and make a deep condition after swimming.
Q: Do quick weaves break natural hair?
A: Some may think that the quick weave would damage natural hair. The truth is that with improper weaving techniques, it does. Damage often occurs by the glue coating your natural hair and clumping hair strands together. However, with proper quick weave technique, the hair weaves should be bonded to the protective cap instead of your natural hair strands. To avoid this happening, wearing two protective weave caps and giving a spray of Got2b on the cap before bonding hair extensions is a smart choice. Moreover, allowing the remover to sit for a while to thoroughly loosen the glue during the removal process can help to minimize breakage.
Q: Can I wash my hair with glue-in weaves installed?
A: Yes, you can get the quick weave wet. Just be mentioned that minimize the frequency of washing your hair extensions and avoid using a shampoo that contains oil or alcohol. Dry shampoo is a suitable alternative between two washing days.
Q: How much does it cost to install a quick weave?
A: Since the quick weave technique allows you to DIY, which saves the bill of hiring a hairdresser. And you just need to pay for the hair weaves. The cost of a quick weave ranges from $60-$200, varying on the quality, amount, and length of the hair weaves. If you opt to let the installation be done by a stylist, the price increase.
Q: How to take off a half-up half-down quick weave?
A: Clip up your natural hair on the crown to expose the weave underneath. Detangle your hair extensions with a wide-tooth comb or your fingers. Apply glue remover or hair oil on the roots and the base to loosen the glue. Let the glue remover sit a bit while and then gently rub to make it work deeply. Gently slide the hair weaves and the wig cap off. Finally, thoroughly wash your hair as normal.
Q: How long can a quick weave last?
A: Typically, with proper care, a quick weave can last for 4-5 weeks. Good quality hair weaves can correct maintenance can prolong its duration. Avoid applying too much heat while styling your glue-in weave. Wrap your quick weaves up with a satin scarf. Wash less and avoid applying hair conditioner on the bonding area during the shampoo process.
For more tips and tricks to maintain quick weaves, click here to explore more: A Comprehensive Guide To Quick Weave.
5 Chic & easy half-up half-down styles with weave
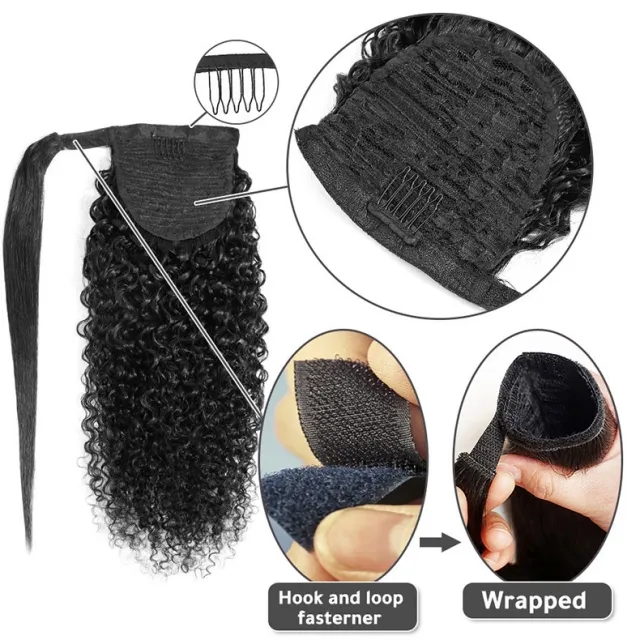
- Half up half down ponytail
This is the most daily and classic half up half down quick weave style. It can perfectly complement all types of outfits and is suitable for all occasions.
Half up half down pony works well on long hair. If your natural hair is very short that can hardly cover the traces, you can add a clip-in ponytail to achieve a natural and voluminous ponytail style.
Here is a simple tutorial for you:
Step 1: Make a half up half down quick weave as the above-mentioned tutorial.
Step 2: Tuck the combs of the clip-in ponytail under the roots of your ponytail.
Step 3: Wrap the strap of the clip-in ponytail around the base of your tie to secure it. Finally, add some hairpins for extra security.
Step 4: Comb and style your hair extensions to achieve a more natural appearance.
- Messy top knot
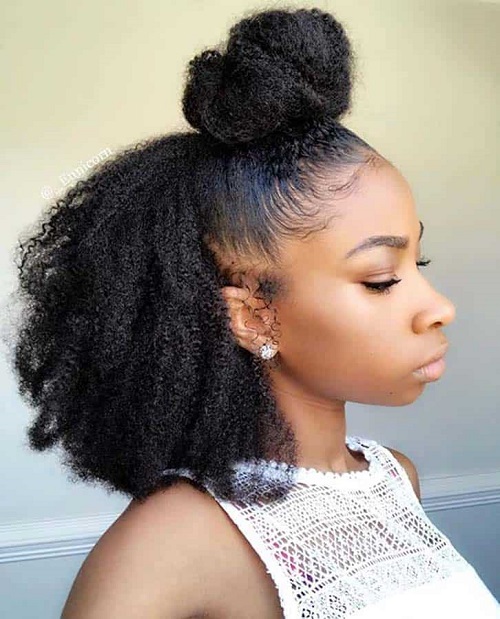
This hairstyle creates a subtle balance against sexy and lazy touch. The messy top knot is also a quick and easy hairstyle that gives you an effortlessly chic look. Here is also a tutorial for you:
Step 1: Make a high ponytail
Step 2: Divide your ponytail into two sections and wrap around each section to create a bun.
Step 3: Secure your bun with a hair tie and add some bobby pins to add extra security.
Step 4: Use your fingers to pull out a few strands of your hair to achieve an effortless lazy touch.
- Space buns half up half down
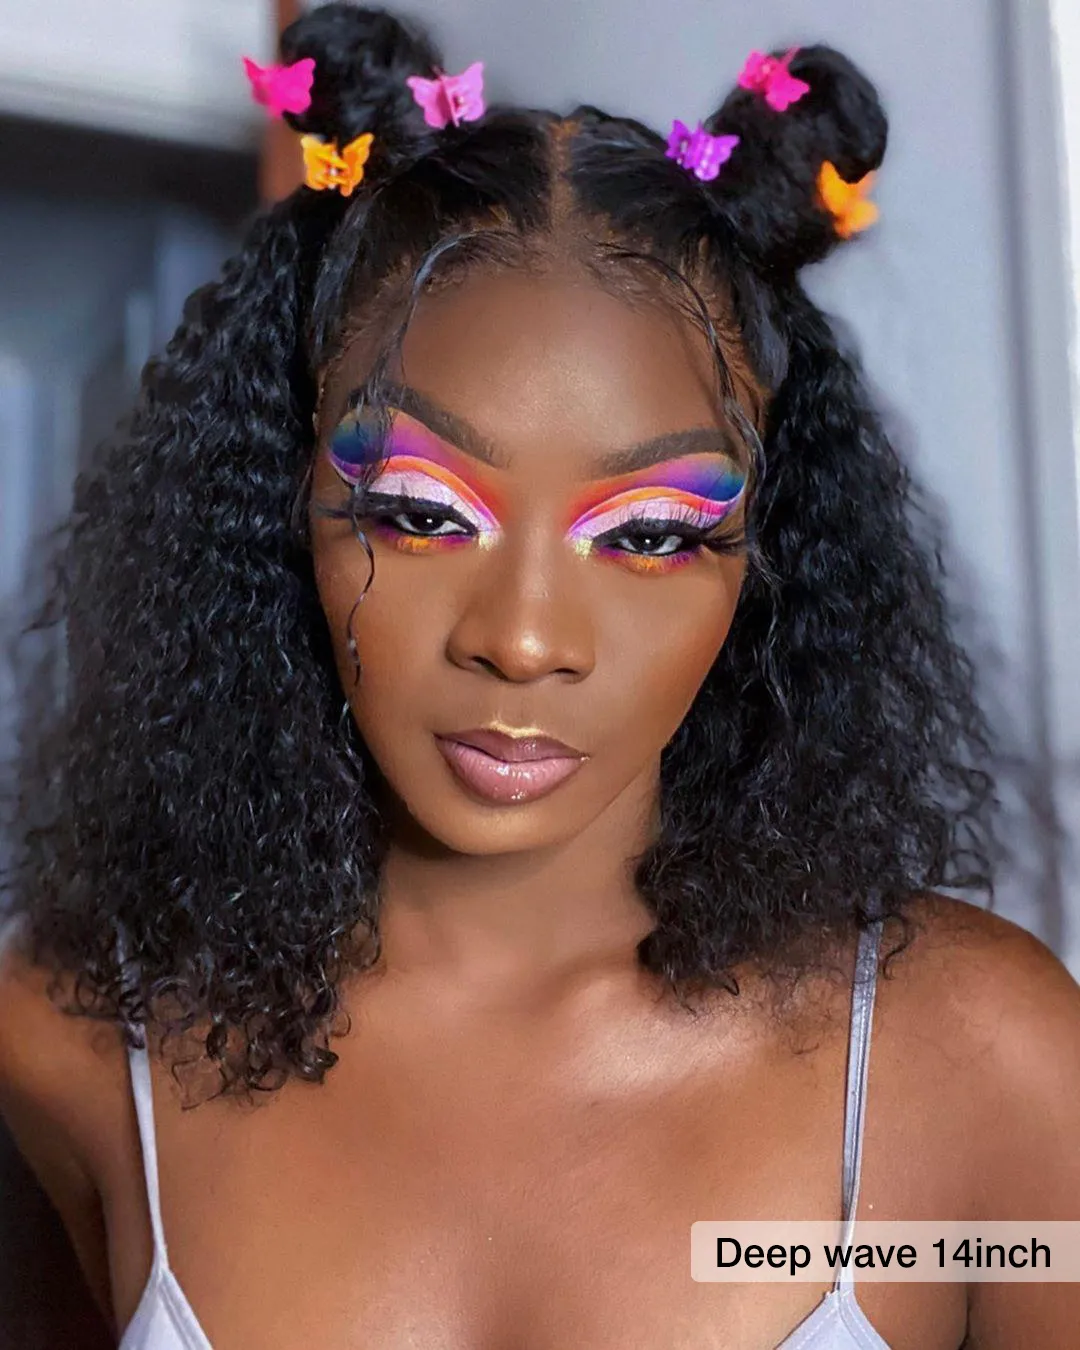
This hairstyle is a cute and chic style that looks good for casual wear. After finishing a half up half down quick weave. Make a middle part on the upper section of your real hair. Braid each side of your hair into a small plait. Wrap around each braid into a small bun. Secure each bun with some bobby pins.
- Flat twist
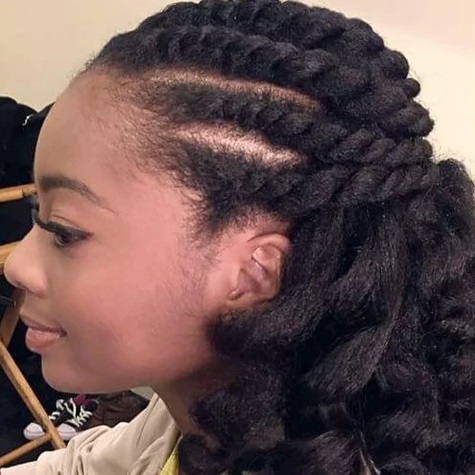
This hairstyle is chic and cool. It's ideal for those who desire a personality half up half down quick weave style.
Step 1: Make a half-up half-down hairstyle.
Step 2: Apply some edge control or leave-in conditioner to slick the upper section of your real hair. Divide the upper section into 6 even parts.
Step 3: Twist each section from your hairline toward the back of your head. Join the twists together and secure the twists with a hair tie.
- Half up half down braids
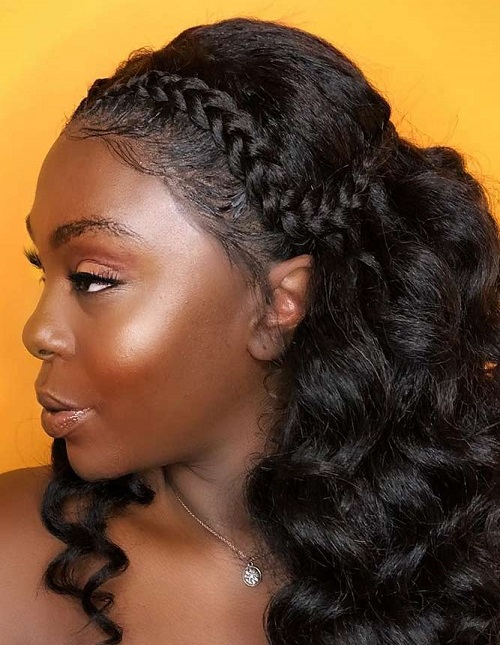
This hairstyle gives your whole look a final touch of grace. It's ideal for an evening party or a wedding.
Step 1: Make a half up half down quick weave.
Step 2: Divide the upper section of your real hair into two even parts.
Step 3: Start with one part. Divide the edge into three sections and braid it into a french plait toward the back of your head. Secure the tail with an elastic band. Repeat the braiding process on another side.
Step 4: Join two plaits on the back of your head and secure them with a hair tie.
Related Posts:
How To Braid Hair Using Human Hair Extensions?
6 Protective Hairstyles Recommended For 4C Hair