 USD
USD EUR
EUR GBP
GBP CAD
CAD AUD
AUD
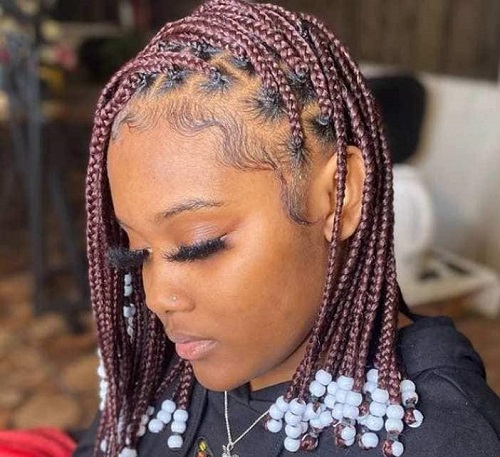
Plaits vs. Braids
Plaits vs. Braids
When it comes to styling hair, the terms "plaits" and "braids" are often used interchangeably. However, although these techniques may appear similar at first glance, there are subtle differences between them. In this post, we will delve into the distinctions between plaits and braids, explore their origins, discuss various styles, and provide helpful tips for mastering both techniques. By understanding the differences between these two popular hair styling methods, you can confidently choose the right approach for your hair type and desired look.
The Origins of Plaits and Braids:
Plaits:
Plaits, also known as "pleats" or "folds," have a rich history dating back thousands of years. They were first documented in ancient Egypt, where they were used to create intricate hairstyles for both men and women. Over time, plaiting techniques spread throughout various cultures, with each region putting its unique spin on the art.
Braids:
Braids have an equally extensive history, with evidence of their use dating back over 30,000 years. The oldest known braided hairstyle, the Venus of Willendorf figurine, was found in modern-day Austria. Like plaits, braids also evolved across cultures, taking on diverse forms and styles as they spread.
Understanding the Differences Between Plaits and Braids:
While both plaits and braids involve intertwining hair strands to create intricate patterns, there are subtle distinctions between the two techniques.
Strand Count:
The primary difference between plaits and braids lies in the number of strands used. Plaits typically involve three sections of hair, while braids can incorporate any number of strands, ranging from three to nine or more.
Technique:
Plaiting consists of alternately weaving the outer strands over the middle strand, creating a symmetrical pattern. On the other hand, braiding may involve more complex techniques, such as underhand or overhand weaving, Dutch or French braiding, and the use of additional strands to create elaborate designs.
Popular Plait and Braid Styles:
Plait Styles:
a. Classic Three-Strand Plait: This timeless style is created by simply weaving three sections of hair together. It is the most common type of plait and can be worn in a variety of ways, including a low side-plait or a high ponytail plait.
b. French Plait: This elegant variation involves adding hair from the sides into the plait as you weave, resulting in a more intricate design that appears to be woven directly into the scalp.
c. Fishtail Plait: To create this sophisticated style, divide the hair into two sections and cross small pieces from each section over to the other side, creating a herringbone pattern.
Braid Styles:
a. Dutch Braid: This "inside-out" braid is created by weaving the strands under each other, resulting in a raised, dimensional effect.
b. Cornrows: This popular style involves creating multiple, tight braids that lie flat against the scalp. Cornrows can be styled in various patterns, from simple straight lines to intricate geometric designs.
c. Box Braids: This protective style uses synthetic or natural hair extensions to create individual braids that can be styled in numerous ways, such as buns, ponytails, or updos.
How To Plait/Braid Hair with hair extensions?
Braiding hair with extensions is an excellent way to add length, volume, and variety to your hairstyles. Here's a step-by-step guide on how to plait/braid hair with extensions:
Step 1: Choose the extensions
Purchase hair extensions that match your hair color and texture. You can use synthetic or human hair extensions, depending on your preference.
Step 2: Prepare your hair
Wash and dry your hair, then comb it to remove any tangles. You may also want to apply a light leave-in conditioner or detangler to make the braiding process smoother.
Step 3: Divide your hair into sections
Decide where you want the braid to begin and part your hair accordingly. The smaller the sections, the more extensions you will need, and the thicker the braid will appear.
Step 4: Section off the extension
Take a small portion of the extension hair and adjust its thickness according to your desired braid size. Hold the extension hair with two fingers, keeping the middle of the extension in line with your natural hair.
Step 5: Combine your hair with the extension
Place the center of the extension hair against the section of your natural hair where you want to start the braid. You should now have three strands of hair to work with two from the extension and one from your natural hair.
Step 6: Start braiding
Begin by crossing the right strand (extension) over the middle strand (your natural hair). Then, cross the left strand (extension) over the new middle strand (the right extension).
Step 7: Add more hair to the braid
As you continue braiding, gently add small sections of your natural hair to the middle strand each time you cross the outer strands. This will ensure that your hair is securely braided with the extensions.
Step 8: Continue braiding
Keep crossing the outer strands over the middle strand, adding more of your natural hair as you go. Make sure to maintain even tension throughout the braid to avoid a loose or uneven appearance.
Step 9: Secure the braid
Once you've reached the end of your hair, continue braiding the extensions without adding more natural hair. When you've reached the desired length, secure the braid with a small hairband or elastic.
Step 10: Finishing touches
Trim any excess extension hair, and apply a light hold hairspray to keep the braid in place. You can also use a small amount of hair oil or serum to add shine and reduce frizz.
Tips for Mastering Plaits and Braids:
Tip 1: Practice Makes Perfect
Whether you're working with plaits or braids, practice is key to mastering the technique. Start with simple styles and gradually progress to more complex designs as you become more comfortable.
Tip 2: Use the Right Tools
A fine-tooth comb, hairpins, and elastic bands are essential for achieving clean, secure plaits and braids. A detangling spray or leave-in conditioner can also help make the process smoother by reducing tangles and frizz.
Tip 3: Be Mindful of Tension
Consistent tension is vital for creating neat, even plaits and braids. However, be cautious not to pull too tightly, as excessive tension can cause discomfort and potential hair damage.
Tip 4: Consider Hair Type and Texture
Different hair types and textures may require unique approaches when it comes to plaiting and braiding. For example, fine hair may need additional products for grip, while coarse or curly hair might benefit from pre-styling moisture.
Tip 5: Maintain Your Style
To keep your plaits and braids looking fresh, wrap your hair in a silk or satin scarf at night to prevent friction and frizz. Regularly moisturize your hair and scalp to maintain their health during long-term protective styles.
Conclusion:
Plaits and braids are versatile, timeless hair styling techniques that offer endless possibilities for creativity and self-expression. By understanding the distinctions between these methods and honing your skills, you can unlock your hair's full potential and confidently experiment with various styles. So, embrace the art of plaiting and braiding, and let your hair be a canvas for your unique personality and taste.
Ula Hair offers a diverse selection of high-quality human hair extensions, specifically designed for creating stunning plaits and braids, ensuring that you can achieve your desired look effortlessly, whether you are aiming for a subtle enhancement or a dramatic transformation. Click and explore!
Related Posts:
Top 10 Knotless Braids With Beads Hairstyles 2023
Knotless Braids Vs. Knot Braids
Top 10 Attractive Cornrow Braid Hairstyles
Everything You Should Know About Knotless Braids