 USD
USD EUR
EUR GBP
GBP CAD
CAD AUD
AUD
Microlinks vs. Tape-Ins: Which Hair Extension Method is Right for You?
Hair extensions have become a transformative solution for those seeking to add length, volume, or a touch of luxury to their locks. In the ever-evolving world of beauty and fashion, two methods have risen to prominence: microlinks and tape-in hair extensions. These methods have gained widespread popularity for their ability to deliver stunning, natural-looking results.
As the demand for hair extensions continues to soar, it's essential to understand the differences between these two techniques to make an informed choice that suits your unique needs. In this article, we delve deep into the world of hair extensions to compare and contrast microlinks and tape-in hair extensions. By the end, you'll have a comprehensive understanding of these methods, empowering you to make the best decision for your hair goals and lifestyle. Whether you're a seasoned extension enthusiast or a newbie exploring the possibilities, read on to discover which hair extension method is right for you.

Understanding Microlink Hair Extensions
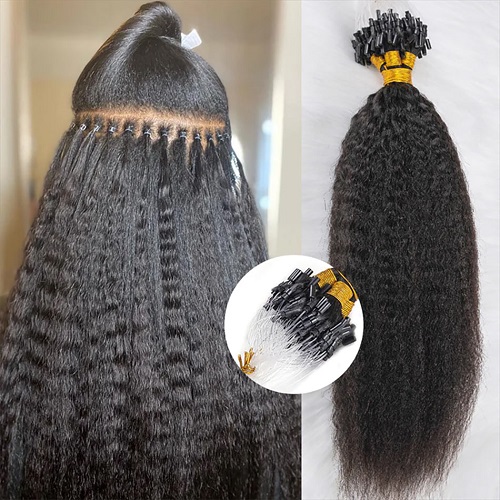
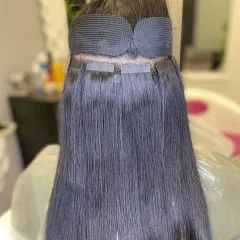
Microlink hair extensions, also known as microbead or micro-ring extensions, have revolutionized the world of hair extensions with their unique application method and natural-looking results. Here, we delve into what microlink hair extensions are, their composition, advantages, and potential drawbacks.
What Are Microlink Hair Extensions?
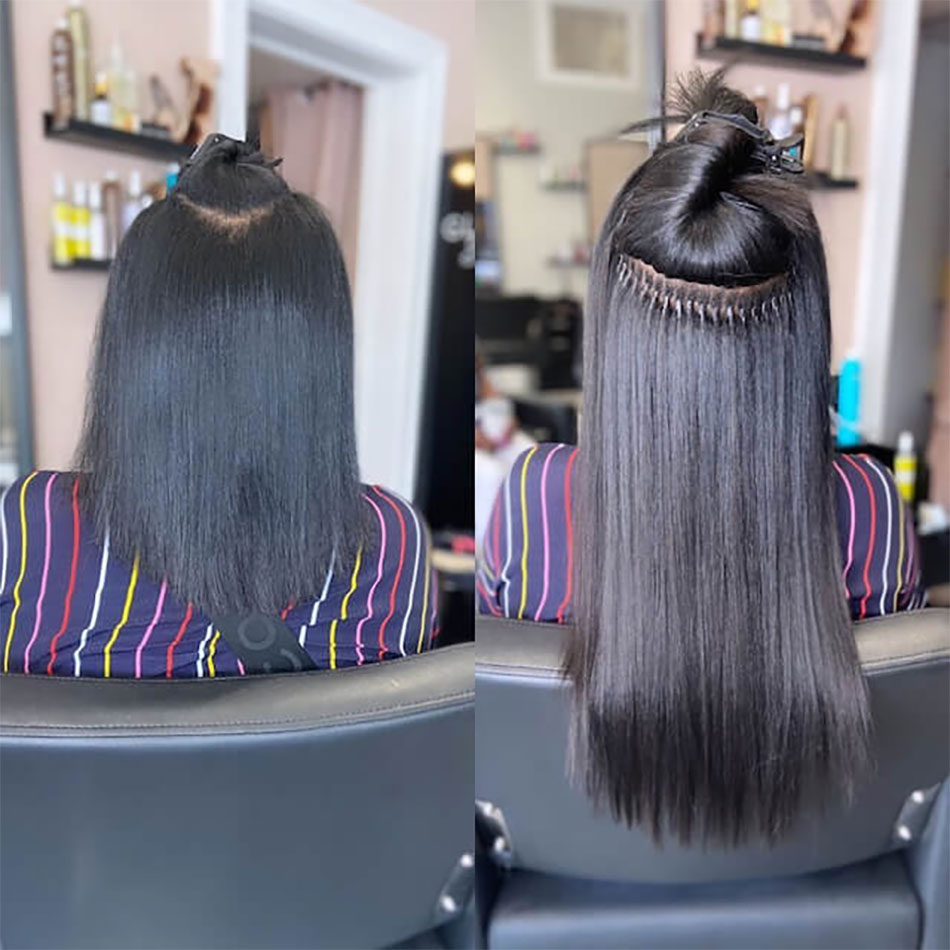
Microlinks are individual hair extensions that are attached to your natural hair using tiny, lightweight metal or silicone rings. These rings, often called microbeads or micro-rings, are clamped around a small section of your natural hair, securing the extension in place. Unlike some other methods that require adhesives or heat, microlinks are applied without any chemical or thermal damage to your hair.
Materials Used in Microlinks: Microlinks are typically made from high-quality materials like aluminum, copper, or silicone. These materials are safe, durable, and designed to blend seamlessly with your natural hair.
Advantages of Microlink Hair Extensions:
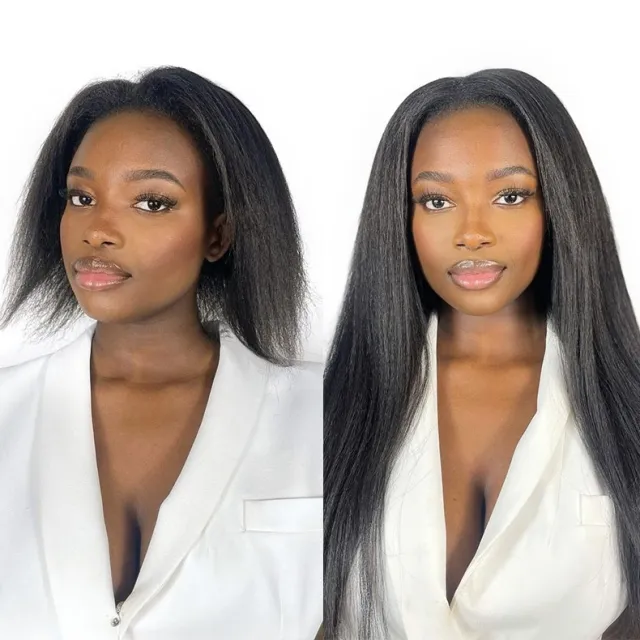
- Natural Look and Feel: One of the standout advantages of microlinks is their ability to provide a natural look and feel. The individual attachments allow the extensions to move and flow like your own hair, making them virtually undetectable.
- Minimal Damage to Natural Hair: Microlinks are known for their gentle application process. They don't require heat or adhesive, which means there's minimal risk of damage to your natural hair. When applied and maintained correctly, microlinks can be a hair-friendly extension method.
- Long-Lasting: Microlinks are renowned for their longevity. With proper care and maintenance, they can stay in place for several months, offering you an extended period of luxurious locks.
Addressing Potential Drawbacks:
- Cost: Microlink hair extensions can be relatively expensive compared to some other methods due to their natural appearance, quality materials, and professional installation.
- Installation Time: The application of microlinks can be time-consuming, as each extension is attached individually. The installation process may take several hours, so it's essential to plan accordingly.
When Are Microlinks the Preferred Choice?
Microlinks are an excellent choice for individuals looking for a long-lasting, natural-looking hair extension method. They are particularly favored by those who want to avoid the use of adhesives or heat on their hair. Microlinks work well for various hair types and textures and are especially suitable for individuals with fine or thin hair, as they add volume and length without causing stress to the natural strands.
In the next section, we'll explore tape-in hair extensions, providing a comprehensive comparison between these two popular hair extension methods.
Exploring Tape-In Hair Extensions
Tape-in hair extensions have surged in popularity due to their speed of application and versatility. In this section, we'll provide an in-depth understanding of what tape-in hair extensions entail, the materials used in their construction, and their advantages and potential drawbacks.
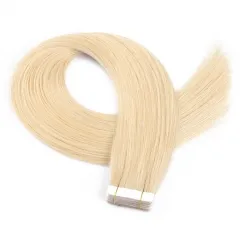
What Are Tape-In Hair Extensions?
Tape-in hair extensions are precisely what the name suggests: hair extensions that come with a thin, flat, and nearly invisible strip of adhesive tape at the top. This tape is applied to your natural hair, creating a secure bond that keeps the extensions in place. Unlike some methods that involve individual attachments, tape-ins are designed in wider wefts, allowing for a quicker application process.
Materials Used in Tape-Ins: Tape-in extensions typically feature high-quality, hypoallergenic adhesive tape. The hair used in these extensions can vary but is often sourced from real human hair, ensuring a natural appearance and texture.
Advantages of Tape-In Hair Extensions:
- Quick and Easy Installation: Tape-in extensions are known for their speedy application. A skilled stylist can attach a full set in a fraction of the time it takes for other methods, making them a convenient option for those with busy schedules.
- Suitable for Various Hair Types: Tape-ins are versatile and suitable for a wide range of hair types and textures. They can add volume, length, or highlights, catering to diverse styling preferences.
- Less Expensive Than Some Other Methods: Compared to certain hair extension methods that require individual attachment or complex installation procedures, tape-in extensions are often more budget-friendly.
Addressing Potential Drawbacks:
- Need for Frequent Maintenance: Tape-in extensions require regular maintenance appointments, typically every 6-8 weeks, to reposition and replace the adhesive. This can be seen as a drawback for those with a busy lifestyle or limited access to a salon.
- Limited Reusability: While tape-in extensions can be reused, the adhesive strip tends to lose its effectiveness after a few removal and reinstallation cycles. This may result in additional costs over time.
When Are Tape-In Extensions the Preferred Choice?
Tape-in extensions are an excellent choice for individuals seeking a quick, cost-effective way to enhance their hair's volume and length. They are especially favored by those with thicker hair and those who want a more straightforward application process. Tape-ins are also ideal for individuals who want to experiment with different hair colors and styles without a long-term commitment, as they can be easily removed and replaced.
In the next sections, we will compare microlink and tape-in hair extensions, helping you make an informed choice based on your unique preferences and needs.

Installation and Maintenance
When considering hair extensions, it's crucial to understand the installation process and ongoing maintenance requirements. Let's compare how microlinks and tape-ins stack up in these aspects.
Comparison of Installation Process:
Microlink Hair Extensions:
- Installation Time: The installation of microlinks can be time-consuming, as each extension is attached individually to small sections of natural hair. This meticulous process may take several hours.
- Procedure: A professional stylist will use small metal or silicone rings to secure the microlinks to your natural hair, ensuring a secure and discreet attachment.
- Precision: Microlinks require a high level of precision to achieve a seamless, natural look.
Tape-In Hair Extensions:
- Installation Time: Tape-in extensions are known for their quick and efficient installation. Larger wefts of extensions are sandwiched between thin strips of adhesive tape, significantly reducing the application time.
- Procedure: A stylist will section your hair and sandwich the natural hair between two tape-in wefts. The process is relatively straightforward and can be completed in a fraction of the time compared to microlinks.
- Efficiency: Tape-ins are ideal for individuals with busy schedules seeking a faster transformation.
Comparison of Maintenance:
Microlink Hair Extensions:
- Maintenance Schedule: Microlinks generally require less frequent maintenance than some other methods. You may need a touch-up appointment every 8-12 weeks, depending on hair growth.
- Maintenance Process: During maintenance, the stylist will reposition any loose microlinks and ensure that the extensions are still secure.
- Home Care: Proper care at home is essential to maintain microlinks. Brushing gently and avoiding excessive tension is crucial to prevent tangling or breakage.
Tape-In Hair Extensions:
- Maintenance Schedule: Tape-in extensions require more frequent maintenance, usually every 6-8 weeks. This involves removing and repositioning the extensions to accommodate hair growth.
- Maintenance Process: The stylist will remove the adhesive and reapply the tape-in wefts during maintenance appointments. This ensures a secure and comfortable fit.
- Home Care: Proper home care for tape-ins involves avoiding products that can weaken the adhesive and gently detangling to prevent matting.
Durability and Longevity
The durability and longevity of hair extensions are crucial factors to consider when choosing the right method for your needs. In this section, we'll explore how long microlinks and tape-in extensions typically last and provide tips on how to extend their lifespan.
How Long Do Microlinks Typically Last?
Microlinks are known for their impressive durability. When properly installed and maintained, microlinks can last anywhere from 3 to 6 months. The lifespan can vary depending on factors such as hair growth rate, care practices, and the quality of the extensions and installation.
Longevity of Tape-In Hair Extensions:
Tape-in extensions are considered semi-permanent, and their lifespan is relatively shorter than microlinks. On average, tape-in extensions typically last around 6 to 8 weeks before they require maintenance. The adhesive used in tape-ins gradually loses its effectiveness, necessitating removal and reinstallation.
Tips to Extend the Lifespan of Both Methods:
For Microlink Hair Extensions:
- Regular Maintenance: Schedule touch-up appointments with a professional stylist every 8-12 weeks to reposition and secure any loose microlinks.
- Gentle Handling: Handle your microlink extensions with care. Avoid excessive pulling or tugging, and be gentle when brushing to prevent damage.
- Proper Washing: Use sulfate-free, gentle shampoos and conditioners. Wash your hair gently, avoiding excessive friction.
- Heat Styling: Limit the use of heat styling tools and use a heat protectant spray when necessary to minimize damage.
- Sleep Protection: Tie your hair in a loose braid or ponytail before bed to prevent tangling and friction against the pillow.
For Tape-In Hair Extensions:
- Regular Maintenance: Stick to a strict maintenance schedule, visiting your stylist every 6-8 weeks to remove, reposition, and replace the tape-in wefts.
- Adhesive Care: Avoid using oily or greasy hair products near the tape bonds, as these can weaken the adhesive. Opt for hair care products that are specifically designed for tape-in extensions.
- Gentle Detangling: Use a wide-tooth comb or a brush designed for extensions to gently detangle your hair, starting from the tips and working your way up.
- Avoid Wet Bonds: After installation, avoid washing your hair or getting the tape bonds wet for at least 48 hours to allow the adhesive to set properly.
- Protective Styling: Consider wearing your hair in protective styles, like braids or updos, to reduce friction and tension on the tape bonds.
By following these tips and adhering to a proper maintenance schedule, you can extend the lifespan of both microlink and tape-in hair extensions, ensuring they remain beautiful and comfortable for an extended period.
Natural Look and Comfort
Achieving a natural look and feeling comfortable with your hair extensions are paramount for many individuals. Let's compare how microlinks and tape-in hair extensions stack up in terms of their natural appearance, texture, and overall comfort.
Comparing the Natural Look and Feel:
Microlink Hair Extensions:
- Natural Look: Microlinks are prized for their ability to provide a remarkably natural look. The individual attachments allow the extensions to blend seamlessly with your natural hair, creating a cohesive and undetectable appearance.
- Natural Feel: Microlinks also offer a natural feel because they move and flow similarly to your own hair. The individual extensions allow for a more flexible and lifelike texture.
Tape-In Hair Extensions:
- Natural Look: Tape-in extensions can deliver a natural look when applied by a skilled stylist. The wide wefts allow for quick coverage, but they may require additional styling to achieve a perfectly blended appearance.
- Natural Feel: Tape-ins are comfortable to wear and offer a relatively natural feel. However, some users may notice a slight difference in texture compared to their natural hair.
Discussing Comfort and Ease:
Microlink Hair Extensions:
- Comfort: Microlinks are known for their comfort due to their lightweight individual attachments. They don't cause significant tension or discomfort when properly installed.
- Ease of Wear: Once installed, microlinks are easy to manage. They move naturally with your hair, and styling options are versatile.
Tape-In Hair Extensions:
- Comfort: Tape-in extensions are generally comfortable to wear, but some users may experience slight discomfort during the adjustment period as they get used to the adhesive tapes.
- Ease of Wear: Tape-ins are easy to wear daily. They lie flat against the scalp, and styling is typically hassle-free.
In summary, both microlinks and tape-in hair extensions offer a natural appearance and comfortable wear when installed and maintained correctly. Personal preferences may play a role in your choice, so it's essential to consider your lifestyle and styling needs when selecting the right extension method for you.
Cost Considerations
Understanding the cost factors associated with hair extensions is essential when making a decision. In this section, we'll break down the cost factors for microlinks and compare them to the costs of tape-in extensions. We'll also highlight some cost-saving tips and considerations.
Cost Factors for Microlinks:
- Extension Quality: The quality of the microlink extensions significantly impacts the cost. High-quality, 100% human hair extensions tend to be pricier than synthetic options.
- Length and Volume: The length and volume of the extensions you choose will affect the overall cost. Longer or thicker extensions require more hair, leading to higher costs.
- Professional Installation: Microlinks should always be installed by a professional stylist, and their fees can vary based on experience and location. Keep in mind that microlinks are installed strand by strand, and the installation process is labor-intensive.
- Professional Touch-Up: Microlinks require professional touch-up appointments every 8-12 weeks, which adds to the overall cost. During these appointments, the stylist will reposition and secure any loose microlinks.
Costs of Tape-In Hair Extensions:
- Extension Quality: Similar to microlinks, the quality of the tape-in extensions, whether human hair or synthetic, will influence the price.
- Length and Volume: The cost of tape-ins can also vary based on the length and volume of the extensions you choose.
- DIY Installation and Removal: Tape-in extensions offer cost savings because they can be installed and removed by the wearer without the need for professional assistance. This eliminates the need for stylist fees for installation and touch-ups.
- Less Frequent Maintenance: Tape-in extensions require less frequent maintenance compared to microlinks.
Cost-Saving Tips and Considerations:
- Choose High-Quality Extensions: Invest in high-quality, 100% human hair extensions. While they may be more expensive upfront, they often have a longer lifespan and a more natural look, making them a better long-term investment.
- DIY Installation and Removal: If you're comfortable with DIY tasks, tape-in extensions offer cost savings since you can install and remove them on your own.
- Extend the Lifespan: Proper care and maintenance are key to extending the lifespan of your extensions, reducing the need for replacements.
- Reuse Extensions: If the extensions are in good condition after removal, you can often reuse tape-ins for another installation, further reducing the overall cost over time.
In conclusion, microlinks are typically more expensive than tape-in hair extensions due to their labor-intensive installation process and the need for professional touch-ups.
Removal Process
The removal process of hair extensions is a crucial step to ensure the health of your natural hair. Here, we'll describe the removal process for both microlinks and tape-in extensions, as well as highlight the potential impact on your natural hair.
Removal Process for Microlinks:
- Consultation: Schedule a removal appointment with a professional stylist who specializes in hair extensions. During the consultation, the stylist will assess the condition of your extensions and your natural hair.
- Detangling: Before removal, your stylist will carefully detangle your hair and extensions to prevent any unnecessary stress or damage.
- Microlink Removal: The stylist will use a profession tool to gently open and release the metal or silicone rings securing the microlinks to your natural hair. This process requires precision and care to avoid pulling or tugging on your hair.
- Extension Removal: After all microlinks are released, the extensions can be gently slid out of your hair without causing damage to your natural strands.
- Thorough Cleansing: Your natural hair will be thoroughly detangled, cleansed, and moisturized.
to Remove Tape-In Hair Extensions:
You Will Need:
- Hair extension adhesive remover
- Wide-tooth comb or extension brush
- Mirror
Step-by-Step Process:
Step 1: Prepare Your Workspace: Find a well-lit area with a mirror.
Step 2: Section Your Hair: Part your hair just above the first row of tape-in extensions and secure the top section away.
Step 3: Apply Adhesive Remover: Lift a tape-in extension, spray adhesive remover on the tape, and wait a few minutes for it to soften.
Step 4: Peel Away Extensions: Gently peel the extension away from your natural hair, avoiding tugging.
Step 5: Comb Out Residue: Use a wide-tooth comb or extension brush to comb out any adhesive residue from your natural hair, starting at the ends.
Step 6: Repeat for Each Weft: Remove each tape-in extension one at a time.
Step 7: Shampoo and Condition: Wash your hair with clarifying shampoo to remove residue, then condition.
Step 8: Detangle and Style: Gently detangle your hair with a wide-tooth comb and style as desired.
Step 9: Store or Prepare for Reinstallation: If reusing, clean and store the extensions according to instructions.
Potential Impact on Natural Hair During Removal:
- Microlinks: The removal process for microlinks is generally gentle on natural hair when performed by a skilled stylist. However, improper removal or excessive tugging can lead to hair breakage or damage.
- Tape-In Extensions: Proper removal of tape-in extensions, whether by a stylist or through DIY, should not result in damage to your natural hair. The use of removal solution to weaken the adhesive minimizes the risk of hair breakage or stress.
Conclusion
In conclusion, the choice between microlinks and tape-in hair extensions is a decision that should be made carefully, taking into account various factors. Here's a summary of key points and guidance on choosing the right method:
Key Points of Comparison:
- Microlinks:
- Installed strand by strand.
- Natural look and feel.
- Minimal damage to natural hair.
- Long-lasting with less frequent maintenance.
- Typically more expensive due to professional installation and maintenance.
- Tape-In Extensions:
- Quick and easy installation.
- Suitable for various hair types.
- Less expensive than some other methods.
- Require more frequent maintenance.
- Can be easily removed DIY.
Choosing the Right Method:
The choice between microlinks and tape-in extensions depends on individual preferences and needs. Consider factors like your budget, desired maintenance routine, and installation process when making your decision.
Explore Ula Hair's Human Hair Extensions:
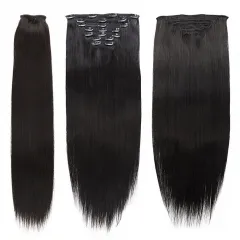
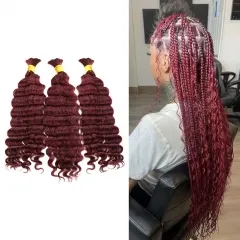
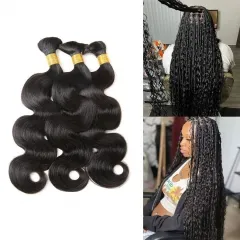
For black women seeking high-quality human hair extensions, Ula Hair offers a range of options, including tape-in hair extensions, microlinks, seamless clip-ins, and human hair bulk for braiding. All of these extensions are made from 100% human hair, ensuring a natural look and feel.
To discover these diverse hair extension options, visit Ula Hair's website. They cater to various styles and preferences, helping you achieve the look you desire with confidence and style.
Make an informed choice, consult with a professional stylist, and explore the range of human hair extension options available to enhance your beauty and confidence. Visit ulahair.com to find the perfect extensions for your unique needs and style.
 40%
40%
OFF Sale-
$85.63
$143.00(1324) (1058)

 40%
40%
OFF Sale-
$59.31
$99.04(1311) (1080)

 40%
40%
OFF Sale-
$78.61
$131.28(1300) (1058)

 40%
40%
OFF Sale-
$87.97
$146.91(1098) (1041)

 40%
40%
OFF Sale-
$65.72
$109.75(1469) (906)

 40%
40%
OFF Sale-
$70.42
$117.60(1088) (1062)

 70%
70%
OFF Sale-
$75.10
$254.37(2062) (1257)

 68%
68%
OFF Sale-
$72.76
$230.93(2046) (1257)

Related Articles:
How to get highlight look with tape in hair?
Tape-In Vs. Clip-In Extensions
Rock Your Braiding Game: Ula Hair's Superior Quality Bulk Human Hair