 USD
USD EUR
EUR GBP
GBP CAD
CAD
A Comprehensive Guide To Quick Weave
Some may think that quick weave is harmful to natural hair due to the application of glue. Some may also think that quick weave is prone to slip-off and cannot be wet. So what is the truth? Keep scrolling. We are here to share with you all the basics about quick weave in this post, including its pros and cons, installation, maintenance, and removal.
What is a quick weave?
A quick weave is a popular weaving method to glue down hair weaves to a protective wig cap on one's head. It's a quick and easy way that allows you to rock at home. To create a fuller and longer hair look. Different from other extension methods, it's available for short hair.
Advantages of having a quick weave
- Protective technique: A quick weave may not seem like a protective technique to some. It's a myth. Quick weaves are created by gluing down hair weaves to a protective wig cap. Your natural hair is under a thick wig cap, which is well protected from heat and products with harsh chemicals. Thus, properly wearing a quick weave is actually a safe way to achieve a volume boost.
- Quick and easy to install: As its name implies, the quick weave is quick and easy to install and remove. A full head quick weave is usually finished in 1-2 hours, with less time consumption than sew-in weave, or cold fusion hair. What's more, the installation and removal process of a quick weave can be completely done at home without sitting for a long time in the salon.
- Less tension on the scalp: Different from tape-in hair extensions and I-tip hair extensions, a quick weave does not directly attach hair extensions to natural hair. With a quick weave, the hair weaves are glued to a protective wig cap. Thus, it brings less tension and discomfort to your scalp.
Disadvantages of getting a quick weave
- Short duration: Compared with sew-in weave, quick weave doesn't last as long. A quick weave can typically last for one month with proper maintenance, half the time of a sew-in weave.
- Risk of hair breakage: This typically occurs when a quick weave is improperly installed and cared for. You should avoid glue directly coating and clumping the hair strands and the scalp, or it may lead to damage.
Does a quick weave damage natural hair?
No, only improper installation and care would damage natural hair. A quick weave is a protective weaving method that allows the wearer to change up their hairstyles freely. But if the bonding glue permeates through the wig cap and coats your natural hair, it may lead to tearing, and even hair shed. Or if the products you used to slick back your natural hair are of poor quality, or if the quick weave stays for too long on your head, the breakage could be leaded. Thus, although the installation and removal of a quick are very easy and can be done at home, we highly suggest letting it be done by a pro.
Can you enjoy swimming with a quick weave installed?
It's okay, but we strongly discourage you from doing so. Because the chlorine used for disinfection inside the pool can lead to tangles and slip-offs. If it's necessary to dive into the pool with a quick weave installed, you should opt for waterproof glue for wearing quick weaves. You should put on a swimming cap in advance to protect your hair before diving into the pool. It is also highly recommended to wash and condition your hair after swimming.
Can you take a shower with a quick weave installed?
Yes. It's ok to get your quick weave wet. The frequency of washing your quick weave should be limited, typically no more than once a week. If you often sweat a lot, the washing times can be added. If you need to take a shower between two washing days, you should put on a shower cap to protect your quick weave. And you should avoid applying hair shampoo that contains oils, silicone, and sulfates to minimize tangles and the risk of slip-off. Last but not least, never wet your hair within 48 hours after quick weave installation.
Who is not a suitable candidate for a quick weave?
- Wearing quick weaves does require using hair glue or gel. Thus, it's not a wise choice for those who have a sensitive scalp and are allergic to hair glue or gel.
- For those who desire a long-term weaving method, quick weave should not be their first choice. A quick weave is ideal for those who desire a quick extension process that can be done at home and for a short-term volume boost.
- A quick weave is also not recommended for those who often sweat a lot or those who enjoy going swimming frequently. Chemicals in the pools may loosen hair glue and cause hair weaves to slip off.
- Those who have very dry scalps are not candidates to go for a quick weave. A dry scalp requires extra moisture upkeep, while a quick weave is sensitive to water and oil.
How much does it cost to install a quick weave?
Quick weave is more budget-friendly than sew-in weave and other weaving methods. A quick weave dressing service typically costs $100 and the hair weave may cost $80-$200. The total consumption can be between $80-$300. It varies depending on if you DIY at home or have it done by a pro, the area you are in, and the quality of hair weaves you buy.
How to install quick weave?
No matter whether you decide to do DIY at home or hire a pro to do the installation, it's crucial you know all the steps. This is so you know whether it's right for you and what to expect.
Here are some items you need to prepare in advance:
1-2 protective wig caps;
Hair glue;
Shampoo and conditioner;
Comb;
Hair clips and elastic bands;
A soft towel;
A pair of scissors;
Thread and needle;
Glue protector (optional);
Molding gel (optional);
Hairdryer (optional).
Step 1: Prepare your natural hair
Shampoo and condition your natural hair as you normally would. Blow dry your natural hair on the lowest heat setting.
- No matter which extension method you decide to go for, a clean and healthy base can always prolong the duration and prevent scalp itch.
- If it's possible, spray a hair protector on your hair before applying heat.
- Ensure your hair is completely dry before diving into the braiding process. Since your natural hair needs to be covered under the wig cap for a few days, wet hair is quite fragile and may lead to breakage to your scalp.
- Before braiding your hair, you need to figure out where you'd like to leave out the weaves.
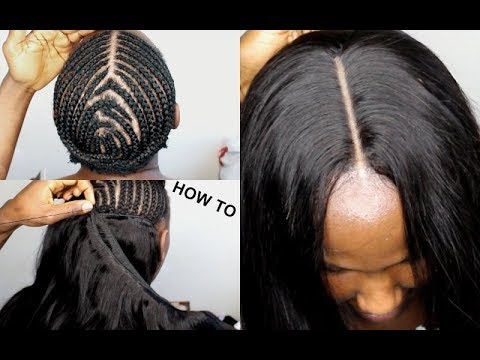
Step 2: Braid your natural hair
Leave out a side part or middle part and about 1 inch around your hairline. Clip these sections together to separate them. Braid the rest of the hair into cornrows.
- If you have short hair, you can simply spread some molding gel to slick back your hair. If your natural hair is long, braid it into cornrows. Secure the ends of the braids with elastic bands, and then stick the ends into the gaps between the cornrows. You can also use some clips to make your hair as flat as possible.
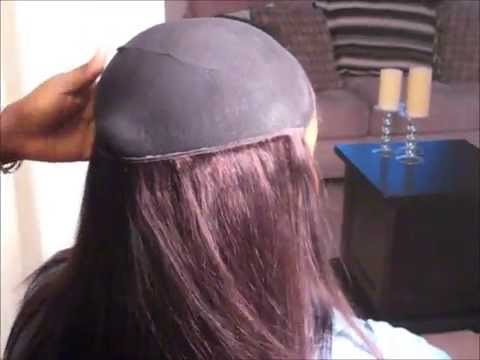
Step 3: Put on a wig cap
Put on a protective wig cap and ensure all your hair is completely covered under the cap. The wig cap works as a barrier to protect your hair from glue. You can put on two wig caps to add extra security. In addition, you can apply glue protectors to the wig cap so that your hair is never coated in glue. Finally, use makeup or chalk to mark the area you wish to leave out. Sew the wig cap into your braided hair around the edges of the leave-out section.
- Before gluing down hair weaves, ensure your hair and the wig cap are completely dry if you have applied molding glue or glue protectors to them.
- Be noticed that opt for a thread that is the same color as your wig cap or your hair weaves to achieve a seamless result.
Step 4: Mark the tracks
About one inch above the nape, draw a horizontal line around the back of your head. And then horizontally line out other tracks every one inch higher. Be aware that you should separate the area you marked for leave out.
- If you desire a fuller hair look or the hair weaves you buy are thin, you can stitch two pieces of hair weaves together to add volume. Also, ensure your hair weaves are completely dry before gluing them to the wig cap if you have applied glue to them. Be careful not to get glue on the hair strands while doing so.
Step 5: Glue in weaves
Grab the end of a hair weave and wrap the hair weave around the bottom track, and cut the opposite end to match the track. Repeat to measure and cut hair weaves to match other tracks.
Start at the bottom and glue in weaves. Apply glue on the top of the hair weft, being careful not to apply glue to the strands. Wrap the hair weave around the back of your head and press it down to match the track. Note that you should press down the glued hair weft for 30-60 seconds so that it is firmly attached to the wig cap. Sit for a while to air dry or blow dry the glue before you move to the next track.
Repeat the process of gluing hair weaves to the wig cap until you have finished a full head.
Step 6: Cut the wig cap
Cut around the leave-out section of the wig cap. Be careful not to cut your weave or natural hair. You can undo your leave-out hair and blend it well with the weave.
Step 7: Comb and style your hair
Comb your hair with a wide-tooth comb to achieve a seamless look. Now the whole quick weave process is finished. If you want a more natural result after installation, you can also use a flat iron to straighten the hair after 48 hours. Human hair weaves allow you to straighten or curl as you desire, but don't forget to spray heat protection before you apply heat to your hair. And always set your styling tools at the lowest heat setting.
Here is a video tutorial on how to make a chic side part quick weave:
How long does a quick weave last?
Typically, a quick weave can stay on one's head for about 4-6 weeks. The duration varies depending on your lifestyle and how you care for it. Hair shed and scalp itch are signs to remove your quick weave. If you regularly devote time to the gym or sweat a lot, the duration can be shorter. Although a quick weave is short-duration, it's ideal for those who desire a quick volume boost that can be done at home. With proper care, the duration of a quick weave can also be longer.
Tips and tricks to maintain a quick weave
Brush:
- Detangle your hair regularly and gently with a wide-tooth comb to minimize tangles. Brushing your hair at least twice a day is highly recommended.
Hair care products:
- Shampoo that contains oil or silicon is not recommended for quick weaves. The ingredients in these products can loosen the glue and cause the hair weaves to slip.
- Shampoo containing sulfates or alcohol is not advisable for quick weaves. Since these ingredients can cause your weaves to dry out.
- Never apply hair conditioner to the roots (where the weaves are attached to the wig cap). Hair conditioners can also loosen the glue and cause tracks to slip out.
Wash:
- Detangle your hair to remove tangles before shampooing your hair.
- Avoid washing your quick weave too frequently, typically, no more than once a week. Alternatively, you can use a dry shampoo between two washing days.
- If you need to take a shower between your hair-washing days, put on a shower cap to protect your quick weave from getting wet.
- Never scrub the bonding area on the wig cap while washing your hair with a quick weave installed.
- Wet your hair with lukewarm water and apply silicone-free shampoo to your hair. Press and massage your scalp and move gently. Never scratch the roots. Work through the shampoo into your hair with your fingers gently section by section. Rinse thoroughly with lukewarm water to remove residues.
- Work through the hair conditioner from the middle to the ends and rinse thoroughly with lukewarm water section by section.
Dry:
- Completely dry the hair weave, the wig cap, and your natural hair underneath after shampooing your hair. Never leave wet hair overnight. Cause sleeping with wet hair can break your natural hair.
- Blow your hair dry section by section on the lowest heat setting.
Heat:
- Never apply heat to your hair within 48 hours after installing a quick weave.
- Apply a heat protector to your hair before styling. Avoid applying heat protection to the roots of the hair, but apply it to the middle and ends.
- Set your heat styling tools at the lowest heat setting.
- Always keep high temperatures away from the roots to avoid them slipping off.
Sleep:
- Never sleep with wet hair. Since wet hair is fragile and prone to breakage. And sleeping with wet hair may lead to a headache.
- Braid your hair into a loose ponytail or a loose plait. And wrap your hair up with a satin scarf to prevent your hair from getting tangled.
How to remove quick weave?
The removal process for quick weave is critical but easy to handle. You can do the job yourself or hire a professional to do it. In addition to using a glue remover that is designed for removing quick weaves, you can use a natural oil instead. This can be coconut oil, olive oil, baby oil, or even a hair conditioner.
Here's a quick step-by-step:
Step 1: Apply glue remover
Use your fingers to lift a hair weft to expose the roots. Spread some glue remover or natural oil on the base of the hair wefts. Press the remover onto the bonding area gently. Repeat to do so, apply glue remover to the base of each hair weft.
- Put on a shower cap and let the glue remover sit for about 40-60 minutes so that the remover can work deeply and thoroughly to loosen the glue.
Step 2: Remove the hair weaves
Take off your shower cap. Use your fingers to wiggle the hair weft. If the hair weft can be moved smoothly, gently peel off the hair weft with your fingers. If the glue still sticks to the base firmly and it's difficult to move, spread more glue remover on the bonding area. Wait for a few minutes until you can easily peel it off. Repeat removing the hair weaves row by row until you finish a full head.
- Be noticed that if you opt for a hair conditioner to remove quick weave, you may need to wait a bit longer. This is because it can penetrate deeply through the base to loosen the glue.
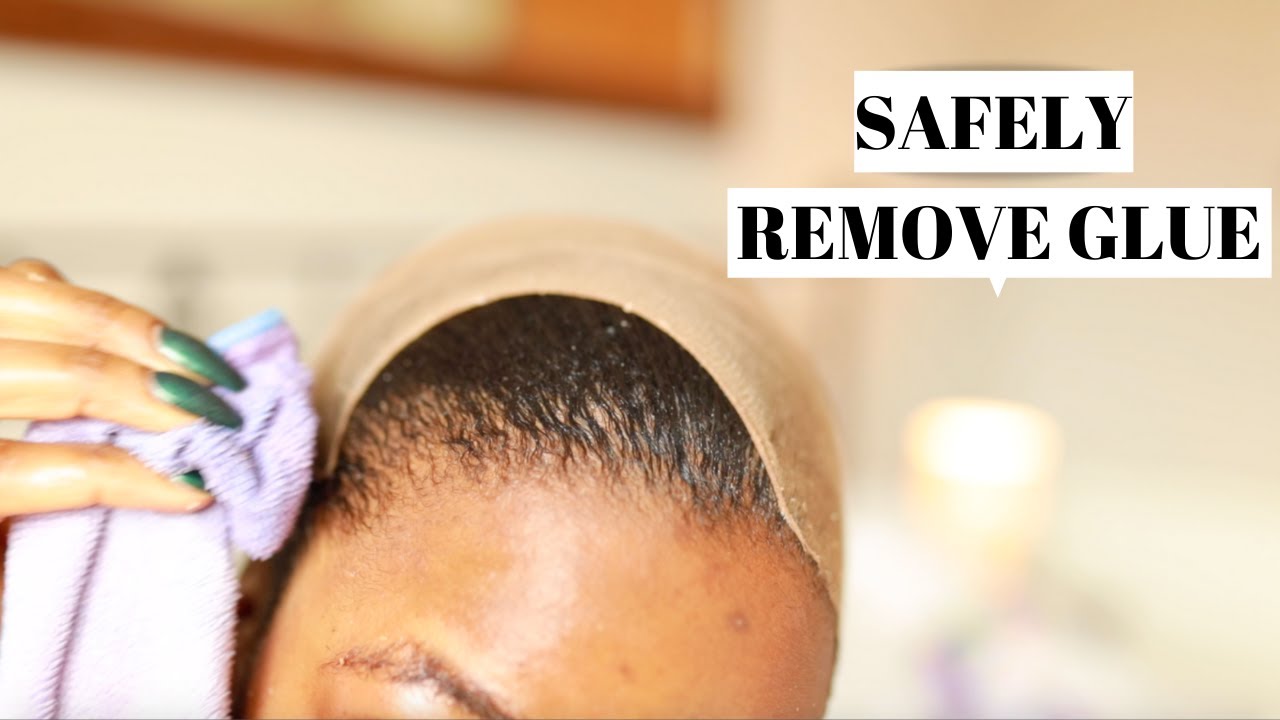
Step 3: Remove the wig cap
If you have sewn down the wig cap into your braided hair in the dressing process, cut off the needle to separate the wig cap. Spread glue remover or natural oil onto the wig cap and massage it. Let the remover sit for a while. Use your fingers to gently peel the edges of the wig cap. If you feel it can move smoothly, gently remove the wig cap. If you feel it is difficult to remove, spread more remover and massage the glue remover onto the wig cap. Rub and massage the remover until the wig cap begins to slide off. Gently peel off the wig cap.
- Give it more time and patience for the glue remover to work deeply into the wig cap to loosen the glue thoroughly. You can reduce the breakage of your natural hair by doing this.
Step 4: Remove the residue
Apply a natural oil to your glued hair. Rub and press the oil into the glue residue with your fingers. Put on a shower cap, and let the oil sit for about 30 minutes to work deeply.
During this time, you can proceed to remove residue from the hair wefts. Also, apply the same oil to the glued hair strands, rub and massage to loosen the glue. Let the oil sit for about 30 minutes so that it can work deeply. And you can return to cleaning your natural hair.
Comb through your natural hair to remove residue.
Step 5: Wash your hair
Shampoo and condition your natural hair as you normally would. Rub and massage during the shampoo process. Allow the hair conditioner to sit for about 30 minutes so that the residue can be thoroughly removed. Rines your hair thoroughly with lukewarm water and pat dry with a soft towel. Rub and massage some natural oil or some leave-in conditioner into your hair to add moisture. Blow your hair dry with the lowest heat setting.
Step 6: Wash your hair weaves
Shampoo and condition your hair weave to remove residue. Rinse thoroughly with lukewarm water. Absorb the excess water with a piece of a soft towel. Let the hair weaves air dry.
Quick weave vs. sew-in weave vs. tape-in hair extensions
Similar to a sew-in weave, a quick weave also requires your natural hair to be braided down in cornrows and hidden under the weaves. With a quick weave, the hair weaves stick to your natural hair via adhesive, similarly to tape-in hair extensions. Sew-in weave, tape-in hair extensions, and quick weave all have some common characteristics which make some feel confused and don't know which way to go.
If you are in this group, keep scrolling. We are going to talk about the differences between them in this part.
Quick weave vs. sew-in weave
- Compared with sew-in weave, the cost of quick weave ranges from $80-$200, which is much more budget-friendly.
- A quick weave technique is typically finished in 1.5 hours, which is faster and easier than a sew-in weave.
- Compared with sew-in weave, quick weave brings less tension to your scalp and natural hair.
- Sew-in weave can stay on one's head for about 2-3 months with proper care. The quick weave has a shorter lifespan than the traditional sew-in.
In conclusion, if you desire a fast and short-term volume boost that allows you to DIY at home, a quick weave is a wiser choice than a sew-in. If you desire a longer-lasting weaving method, the sew-in weave is more suitable for you. If you often sweat a lot or you go swimming frequently, sew-in hair is a safer choice than a quick weave.
Quick weave vs tape-in hair extensions
- Quick weaves are available for those who have very short hair or even bald hair. Tape-in hair extensions are more suitable for those whose hair length is longer than 4 inches.
- Tape-in hair extensions allow all your natural hair to expose out of the weave, while with a quick weave, your natural hair has to be braided down into cornrows and covered under a wig cap. Thus, tape-in hair is much more breathable and comfortable than sew-in hair.
- Tape-in hair allows you to access your scalp and natural hair, so your hair care routine can work more smoothly than on sew-in hair.
- Since the adhesive applied to the tab of tape-in hair extensions is typically medical grade, which makes tape hair extensions a more gentle and safer choice than a quick weave.
Therefore, if you have very short hair that can barely hide the tape, the quick weave is more suitable for you. If you pursue premium breathability and comfort, tape-in hair will never let you down.
It depends more on your lifestyle and preferences as to which weaving method to choose. Or you can give them all a try, and you will know which way to go. Explore high-quality human hair weaves and tape-in hair extensions at Ula Hair. All our hair extensions are made of 100% human hair and are typically 30%-40% cheaper than other hair vendors.
Top 5 quick weave hairstyles 2022
Hair extensions can not only add length and volume to natural hair but they can also be worn in a variety of ways. Here are some stylish quick-weave hairstyles that are preferred by tons of black women.
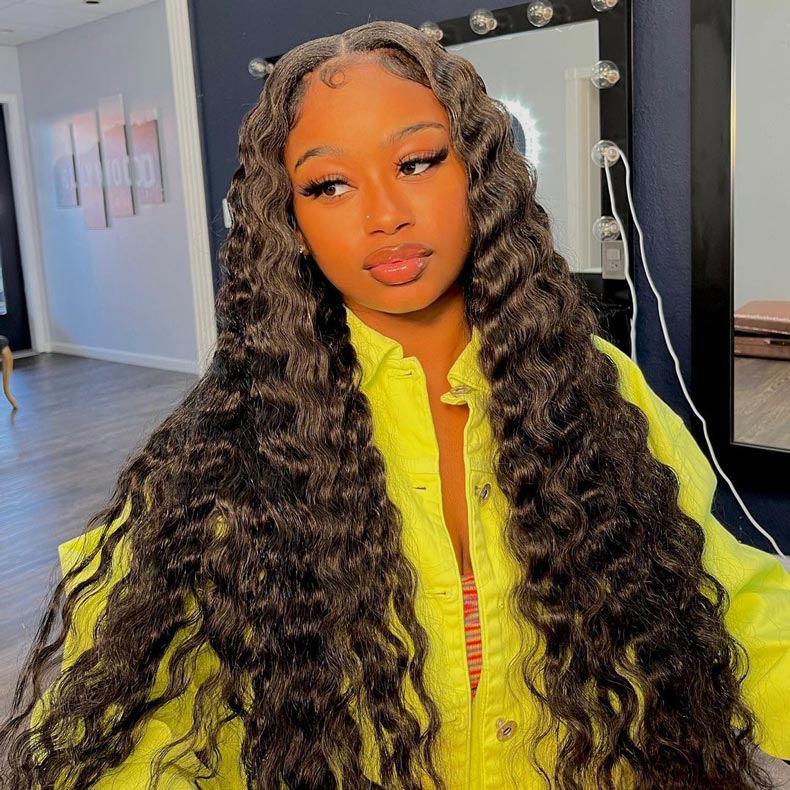
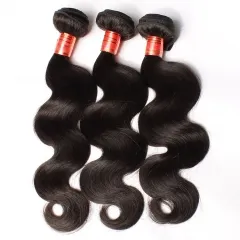
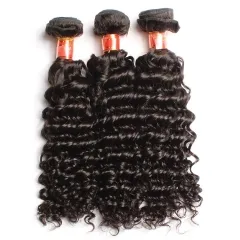
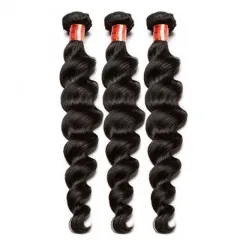
Curly weave hairstyle
Loose and fluffy curls add volume and lightness to your hair. This bouncy, luxurious weave look is perfect for anyone who desires a voluminous style.

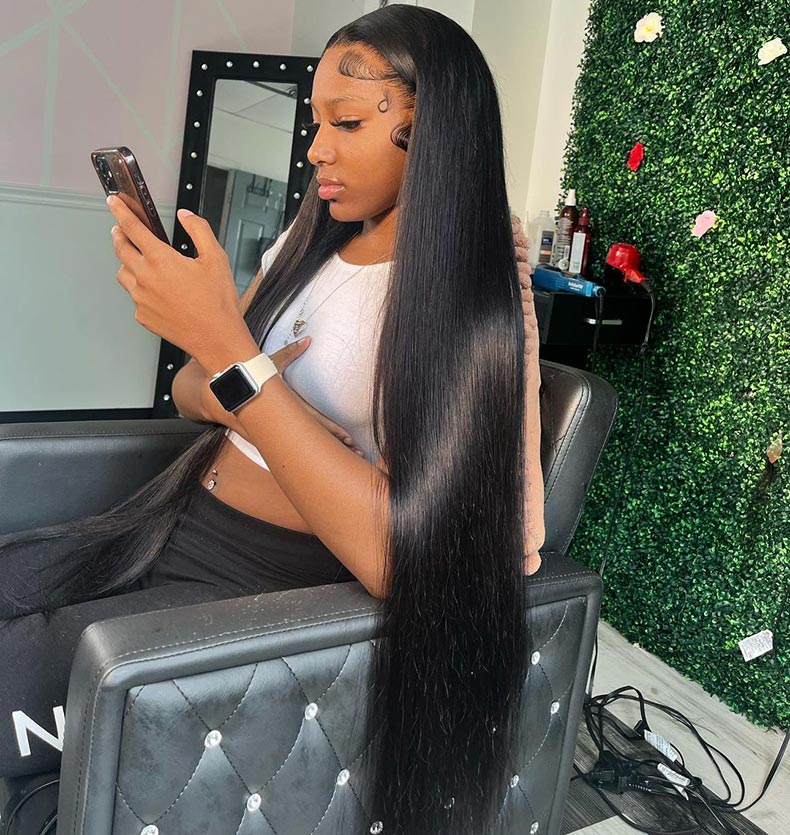
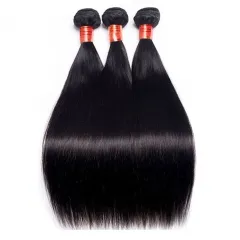
Sleek straight hair
Straight hair with a sleek finish is very smooth and textured. It is neat and chic, and perfectly matches all types of clothes and occasions.
Layer bob style
No matter if your face is heart-shaped, oval, square, or round, there is a bob hairstyle that's right for you.
Side part quick weave
This is an ideal hairstyle for diamond-shaped ladies. A side part can perfectly soften your features.
Half up half down
Half-up half-down hairstyles are easy to create and are classic. It's sleek and works well for all occasions. Here is a video tutorial on how to create a sleek quick weave half up half down style.
Related Posts:
Tutorial: How to install clip-in extensions?
Tutorial: How to tape in hair extensions?