 USD
USD EUR
EUR GBP
GBP CAD
CAD
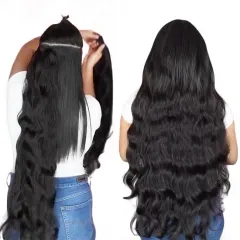
Mastering Microlinks: The Art of Itips and Bead Weft Extensions
At Ula Hair, where the fusion of quality and beauty takes center stage, our mission is crystal clear: to provide top-tier human hair wigs and extensions that effortlessly enhance your natural charm. In this exploration of hair perfection, we'll delve into the timeless allure and practical benefits of I-tip hair extensions—a steadfast classic in the realm of hair extensions. Join us as we uncover the secrets behind I-tip hair extensions, guiding you toward a seamlessly enhanced and naturally beautiful look.
Unveiling I-tip Hair Extensions - A Classic Approach to Hair Extensions
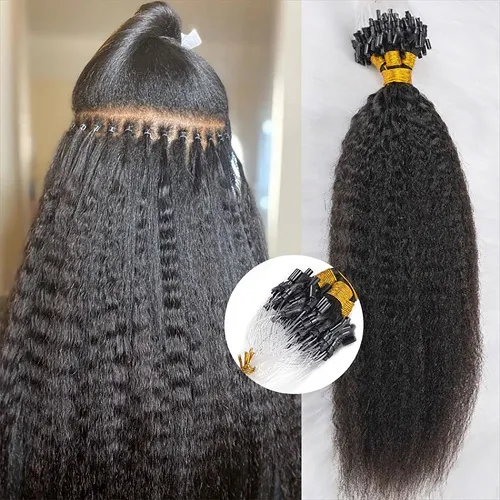
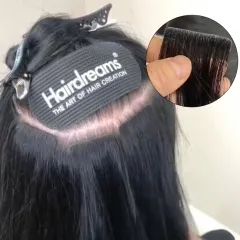
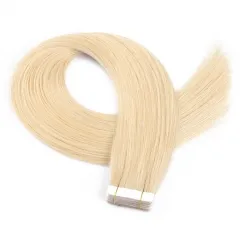
In the realm of hair extensions, I-Tip extensions emerge as individual strands of hair artfully attached to natural locks using small metal rings or beads. What sets this method apart is its gentle approach — no heat or glue is involved, making I-Tip extensions a softer and chemical-free option for your precious locks.
Advantages of I-tips:
Choosing I-tip hair extensions for your hair extensions comes with a host of benefits:
1. Gentle Attachment: I-tip hair extensions use small metal rings or beads, avoiding the need for harsh chemicals or heat during application.
2. Heat-Free Application: Say goodbye to potential heat damage as I-tip hair extensions skip the use of heat, ensuring your natural hair remains healthy.
3. Seamless Blend: I-tip hair extensions seamlessly integrate with your natural hair, offering a discreet and natural appearance that suits various styles.
4. Durable Hold: Microbeads and secure crimping create a lasting hold, allowing you to confidently flaunt your enhanced hairstyle.
5. Styling Freedom: I-tip hair extensions provide styling flexibility, adapting effortlessly to your preferences, whether it's casual waves or elegant updos.
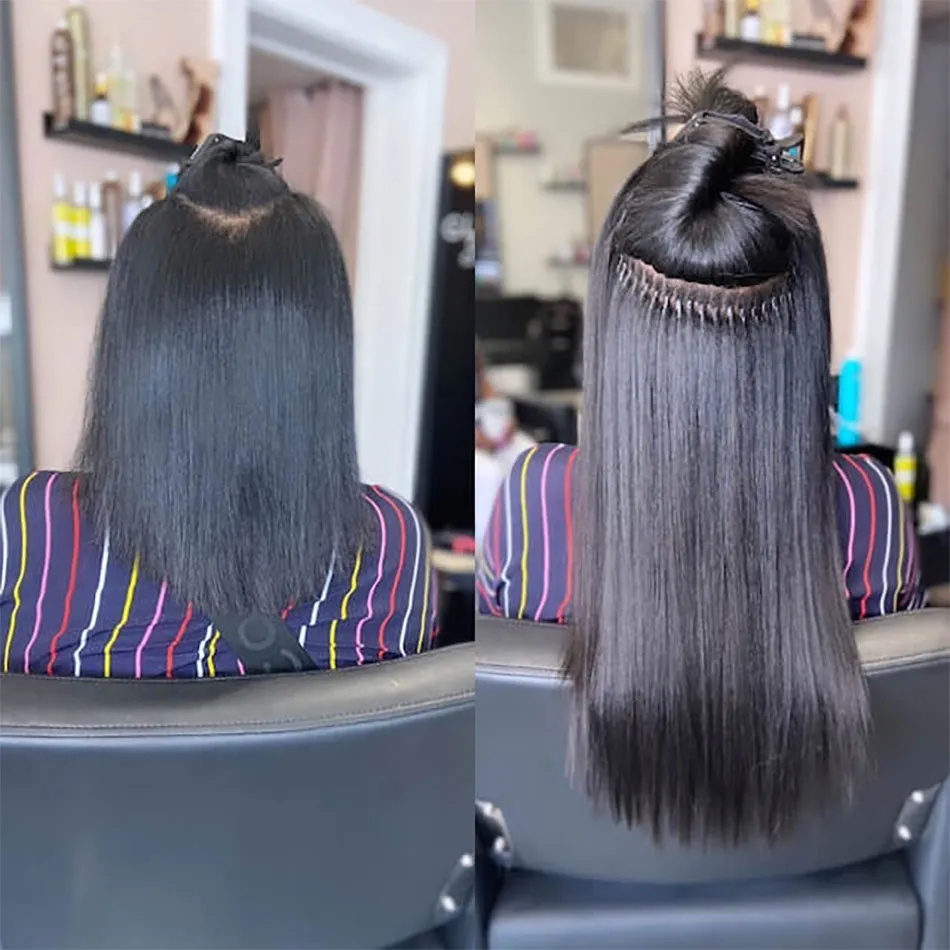
Step-by-Step Guide to apply I-tip hair extensions
Applying I-tip hair extensions involves a meticulous process to ensure a seamless and natural look. Here's a step-by-step guide to help you with the application:
Materials Needed:
1. I-tip hair extensions
2. Microbeads or micro rings
3. Pulling needle or hook
4. Hair extension pliers
5. Sectioning clips
6. Comb
Step 1: Preparing the Hair
· Begin with clean, dry hair. Ensure it's free from any tangles or knots.
· Section the hair, leaving the bottom layer loose and clipping the upper layers to keep them out of the way.
Step 2: Sectioning the hair
· Take a small section of hair near the nape of the neck as the base row.
· Use the comb to divide a small section of hair, and secure the rest with clips.
Step 3: Threading the Microbead
· Begin by pre-sectioning the hair, typically at about ¼ to ½ an inch, Using a hair threader, thread a microbead onto the pre-sectioned portion of hair near the scalp.
Step 4: Inserting the Keratin-Tip Extension
· With the microbeads in place, the keratin-tip hair extension is carefully inserted into the bead. Use the hair extension pliers to clamp the microbead securely in place. Ensure it's tight enough to hold the extension but not too tight to cause discomfort.
Step 5: Section-by-Section Application
· Continue the process, working in rows towards the crown of the head.
· Take even sections of natural hair, thread the pulling needle through the I-tip extension, position it near the root, slide the microbead over, and clamp it with the pliers.
Step 6: Blend and Style:
· Once all extensions are applied, release the clipped sections of hair and blend them with the extensions.
· Comb through the hair to ensure a seamless blend.
Be noted that:
· Avoid washing the hair for 48 hours after the application to allow the microbeads to set.
· Be gentle when brushing and avoid scratching or pulling the roots to prevent slide-off.
· Remember that I-tip hair extensions should ideally be applied by a professional to ensure proper placement and reduce the risk of damage to the natural hair. If you're not experienced, consider seeking the help of a hairstylist for the best results.
Microlinks 101: Simplifying the Basics
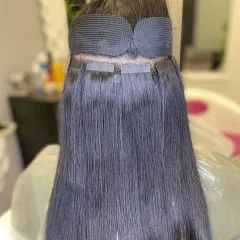
Microlinks, the masters of seamless hair integration, offer versatile styling options, primarily through two types: I-tip hair extensions and beaded weft extensions.
Understanding Microlinks:
Microlinks are a sophisticated solution for seamless hair extensions, ensuring a natural blend by discreetly connecting tiny links to your natural hair.
Types of Microlink Extensions:
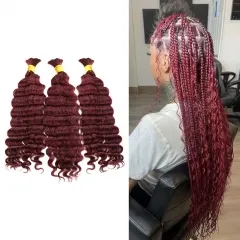
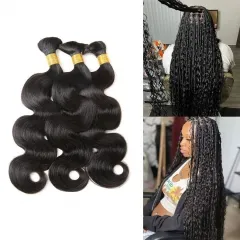
In the microlink family, two main types stand out. I-tip hair extensions involve individual strands bonded with keratin, while beaded weft extensions use small, silicone-lined beads to attach a weft of hair. Both options provide a customizable experience tailored to your preferences.
As we explore microlinks, the dance between I-tip hair extensions and beaded weft extensions showcases the versatility of this method, offering various styling possibilities for your hair transformation.
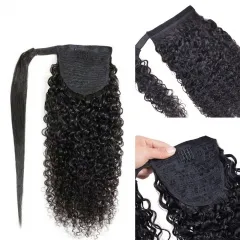
I-tip hair extensions vs. Beaded Weft Extensions:
In the realm of microlinks, distinguishing between I-tip hair extensions and beaded weft extensions is essential. Let's break down the differences and similarities between these two popular options.
The major difference is the installation method. Beaded weft extensions involve attaching a weft of hair using small, silicone-lined beads, instead of individual strands.
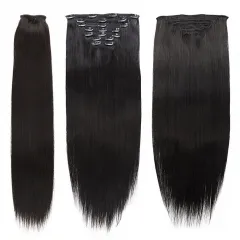
Bead Weft Extensions Installation Process:
Applying bead weft extensions involves attaching wefts of hair to small sections of your natural hair using beads or micro rings. Here's a step-by-step guide to help you with the application:
Materials Needed:
1. Bead weft extensions
2. Pulling needle or loop tool
3. Hair extension pliers
4. Sectioning clips
5. Comb
Step 1: Prepare the Hair:
· Begin with clean, dry hair, ensuring it's tangle-free.
Step 2: Sectioning:
· Section your hair into horizontal rows from upper the nape toward the crown, leaving the bottom row free and securing the upper layers with clips.
Step 3: Attach the Microbead:
· Thread the pulling needle or loop tool through a microbead.
· Take a small section of natural hair, insert the needle through the bead, and pull the natural hair through the bead.
· Repeat to thread the bead. Ensure the weft is flat and even.
Step 4: Position the Bead Weft:
· Lay the bead weft extension over the natural hair that's pulled through the microbead. Ensure that the weft is positioned at about ¼ to ½ an inch close to the scalp.
Step 5: Clamp the Bead:
· Use the hair extension pliers to clamp the microbead securely in place. Ensure that it's tight enough to hold the extension but not too tight to cause discomfort.
Step 6: Repeat the Process:
· Continue the process, working in rows towards the crown of the head.
· Take small sections of natural hair, thread it through the microbead, position the bead weft extension, and clamp the bead with the pliers.
Step 7: Blend and Style:
· Once all bead weft extensions are applied, release the clipped sections of hair and blend them with the extensions.
· Comb through the hair to ensure a seamless blend.
Optional Step: Cut and Style:
· Trim and style the extensions to blend seamlessly with your natural hair.
This method influences the overall appearance, creating a seamless blend with your natural hair for a distinctive look.
I-tip hair extensions vs. Beaded Weft Extensions: Analyzing Key Aspects:
1. Styling Options:
· I-tip hair extensions: Offer precision and versatility with individual strands bonded using keratin.
· Beaded Weft Extensions: Bring an elegant flow to your hairstyle, enhancing the overall aesthetic.
2. Comfort:
· I-tip hair extensions: Known for their lightweight feel and natural movement.
· Beaded Weft Extensions: Provide comfort with a weft that seamlessly integrates into your hair.
3. Maintenance:
· I-tip hair extensions: Minimal maintenance is required for lasting hold and style.
· Beaded Weft Extensions: Maintain their elegant appearance with straightforward care routines.
By understanding these differences and similarities, you can make an informed choice, selecting the microlink extension that aligns seamlessly with your preferences and lifestyle. If you value precision and versatility, I-tip hair extensions may be your ideal choice. Alternatively, if you lean towards an elegant flow and easy maintenance, beaded weft extensions could be the perfect fit. Your decision ultimately hinges on aligning these considerations with your personal style and lifestyle preferences.
Addressing Concerns - Debunking the Myth of I-tip hair extensions Hair Damage
Hair perfection is the goal, but concerns about potential damage can cloud the excitement of Itips. Let's debunk common misconceptions, seek expert perspectives, and offer practical maintenance tips to ensure your journey with I-tip hair extensions is both flawless and worry-free.
Common Misconceptions:
1. Myth: I-tip hair extensions Cause Damage - Debunked: Contrary to popular belief, when installed and maintained correctly, I-tip hair extensions are not inherently damaging to natural hair. Dispelling this myth is crucial to understanding the potential for a harmonious blend between your natural locks and extensions.
Expert Perspectives:
1. Tips from Hair Professionals: Hair professionals provide invaluable perspectives on mitigating any potential risks. They often emphasize the importance of proper installation techniques, ensuring the weight distribution is balanced, and regular check-ins to maintain the health of your natural hair.
Maintenance Tips:
1. Proper Care Routines: Mitigate any risk of damage by adhering to practical maintenance tips.
2. Gentle Detangling: Use a wide-tooth comb to gently detangle your hair, starting from the tips and working your way up to the roots to prevent unnecessary stress on the bonds.
3. Regular Check-Ins: Schedule regular check-ins with a professional stylist to monitor the condition of both your natural hair and the I-tips.
4. Avoiding Excessive Heat: Minimize the use of heat styling tools and use protective products to shield both your natural hair and the extensions from excessive heat damage.
In debunking the myths surrounding I-tip hair extensions and addressing concerns head-on, we pave the way for a confident and beautiful hair transformation journey. With the right knowledge and care, I-tip hair extensions can seamlessly enhance your look without compromising the health of your natural locks.
Conclusion:
In the realm of hair extensions, I-tip hair extensions emerge not just as a classic method but as a timeless companion on the journey to enhanced beauty. I-tip hair extensions and bead weft extensions share common benefits — a gentle approach, versatility in styling, and a seamless blend with natural hair. It's not just about a hairstyle; it's about a commitment to your hair's health and your unique style preferences.
At Ula Hair, this commitment is woven into every strand. We take pride in providing quality extensions that not only elevate your look but also enhance your natural beauty. Our dedication to offering premium human hair extensions. Discover the timeless appeal, versatility, and quality that I-tip hair extensions bring to your hairstyling experience. Embrace the beauty of simplicity and refinement with Ula Hair — where every strand tells a story of style and sophistication.
 40%
40%
OFF Sale-
$87.97
$146.91(1098) (1043)

 40%
40%
OFF Sale-
$65.72
$109.75(1470) (906)

 40%
40%
OFF Sale-
$70.42
$117.60(1089) (1062)

 40%
40%
OFF Sale-
$85.63
$143.00(1324) (1058)

 40%
40%
OFF Sale-
$59.31
$99.04(1311) (1081)

 40%
40%
OFF Sale-
$78.61
$131.28(1300) (1058)

 70%
70%
OFF Sale-
$75.10
$254.37(2062) (1257)

 68%
68%
OFF Sale-
$72.76
$230.93(2046) (1257)

Related Articles:
I-Tip Hair Extensions: Everything You Need to Know
Get the Perfect Look with Microlinks: The Ultimate Guide
Microlinks vs. Tape-Ins: Which Hair Extension Method is Right for You?
Clip-in extensions Vs. Microlink extensions